Easy Steps on How to Make a Radial Chart in PowerPoint
Jun 19, 2023
Do you want to create a new creative design for your data comparison in PowerPoint?
Today, we will show you how to make a radial chart in PowerPoint. This way, you can easily visualize and differentiate data in presentations.
In this blog post, we will walk through the following:
-
Make a radial chart in your PowerPoint presentations
-
Add labels to your radial chart
-
Frequently asked questions about creating radial diagrams on PowerPoint presentations

Make a Radial Chart in Your PowerPoint Presentations
If you want to elevate your visual representation of your data in PowerPoint presentations, follow these steps:
-
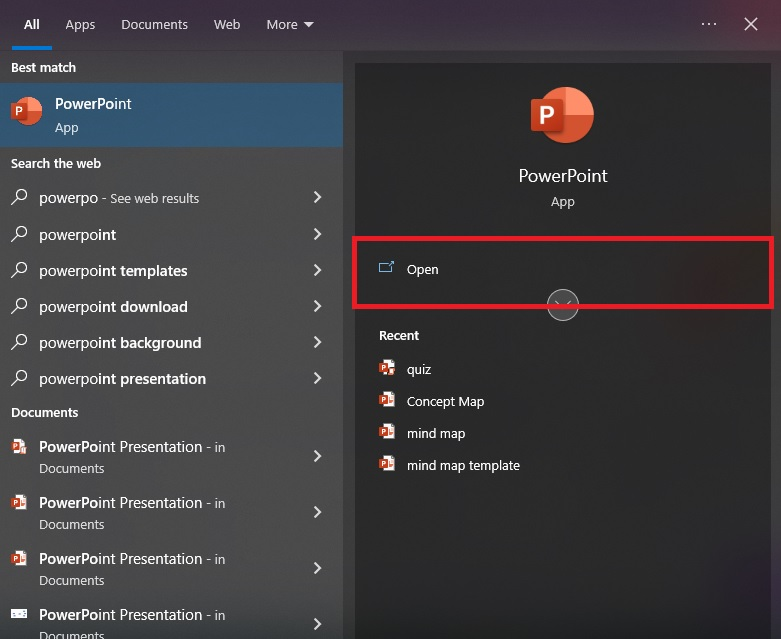
Launch Microsoft PowerPoint on your computer.
-
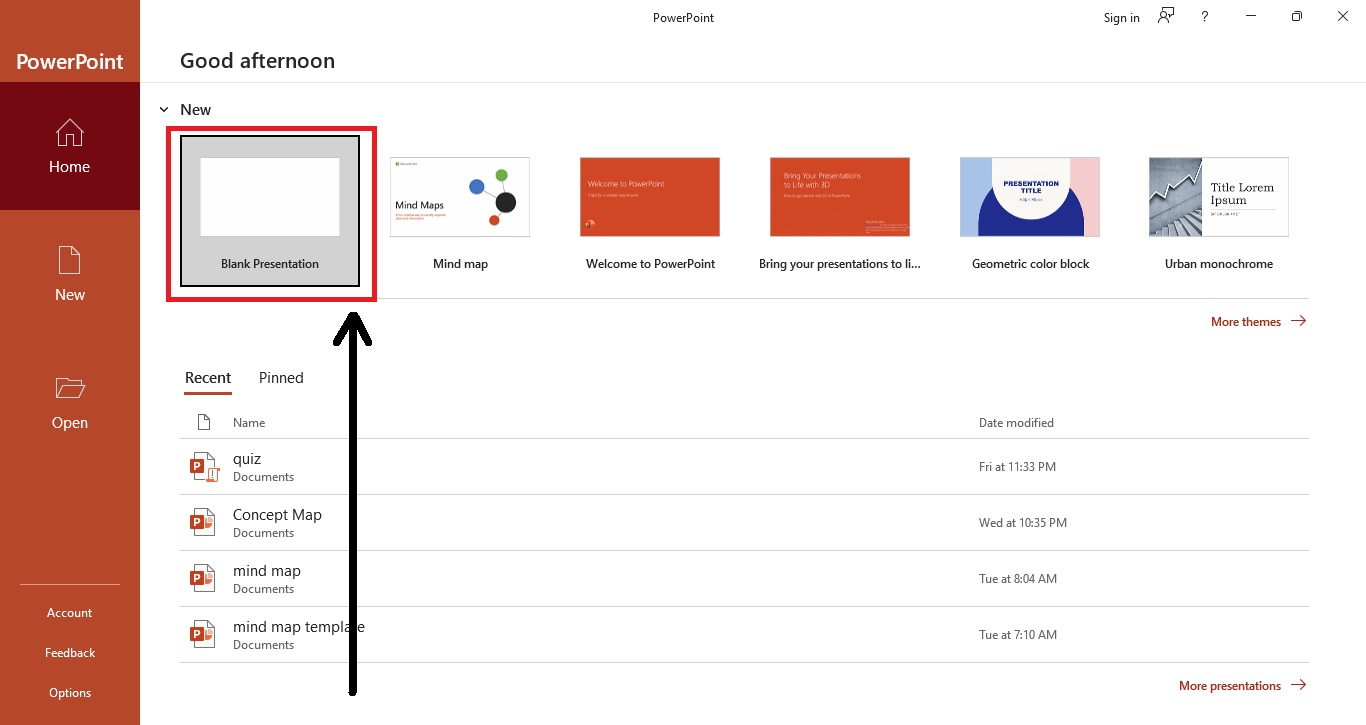
Select a blank presentation where you will create a radial chart.
-
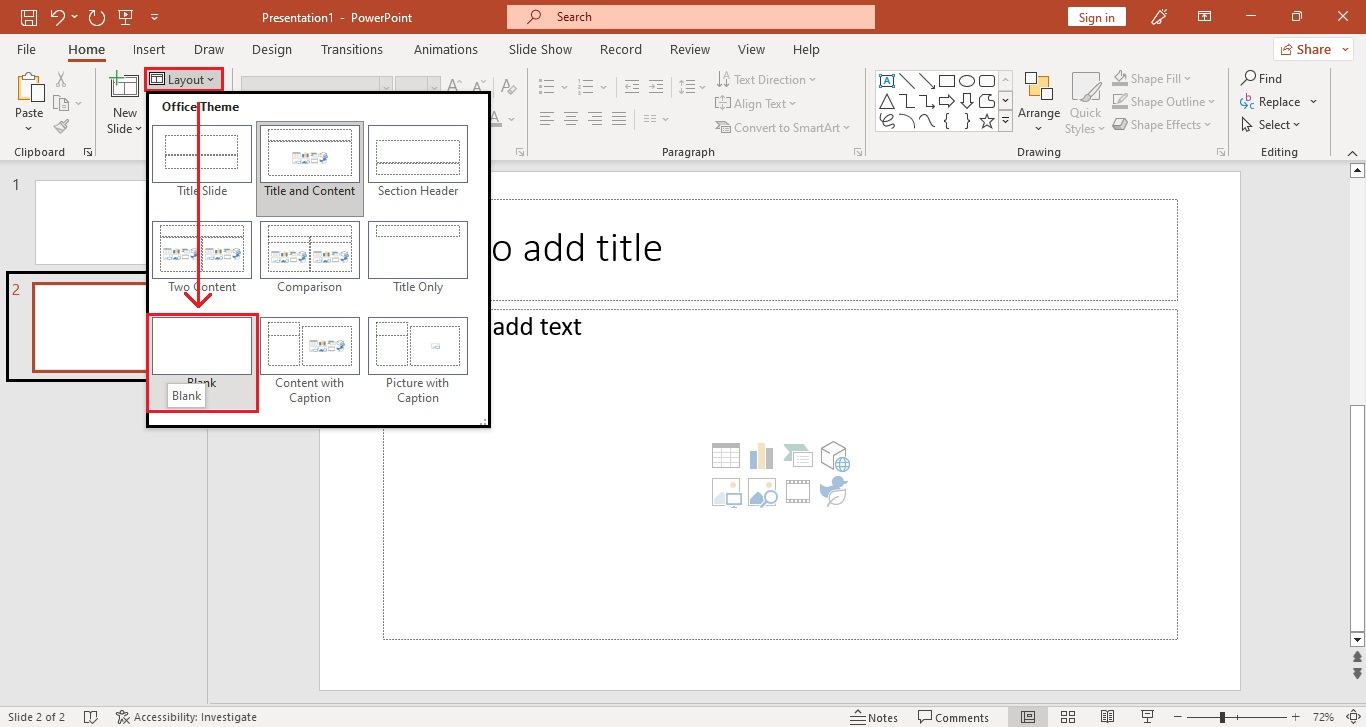
Create a new slide for your radial chart template, then select the "Layout" option from your "Home" tab. Click the "Blank" slide layout.
-
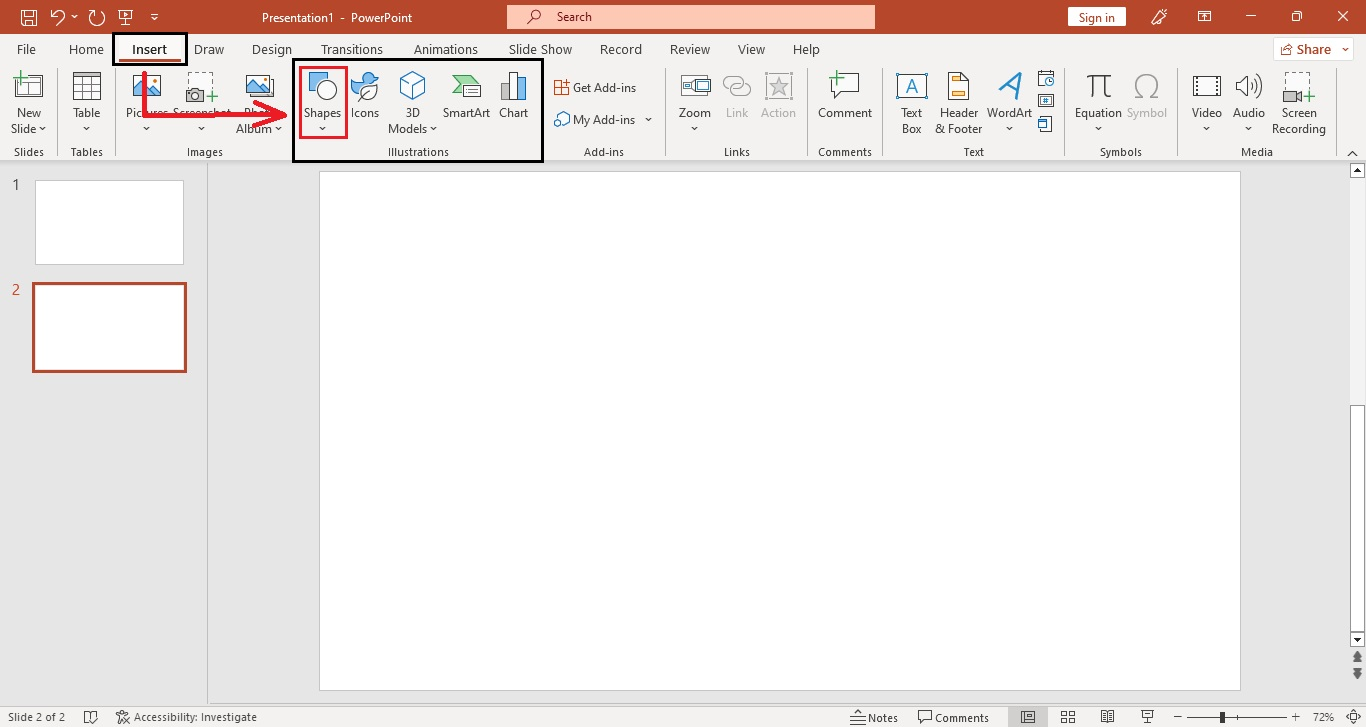
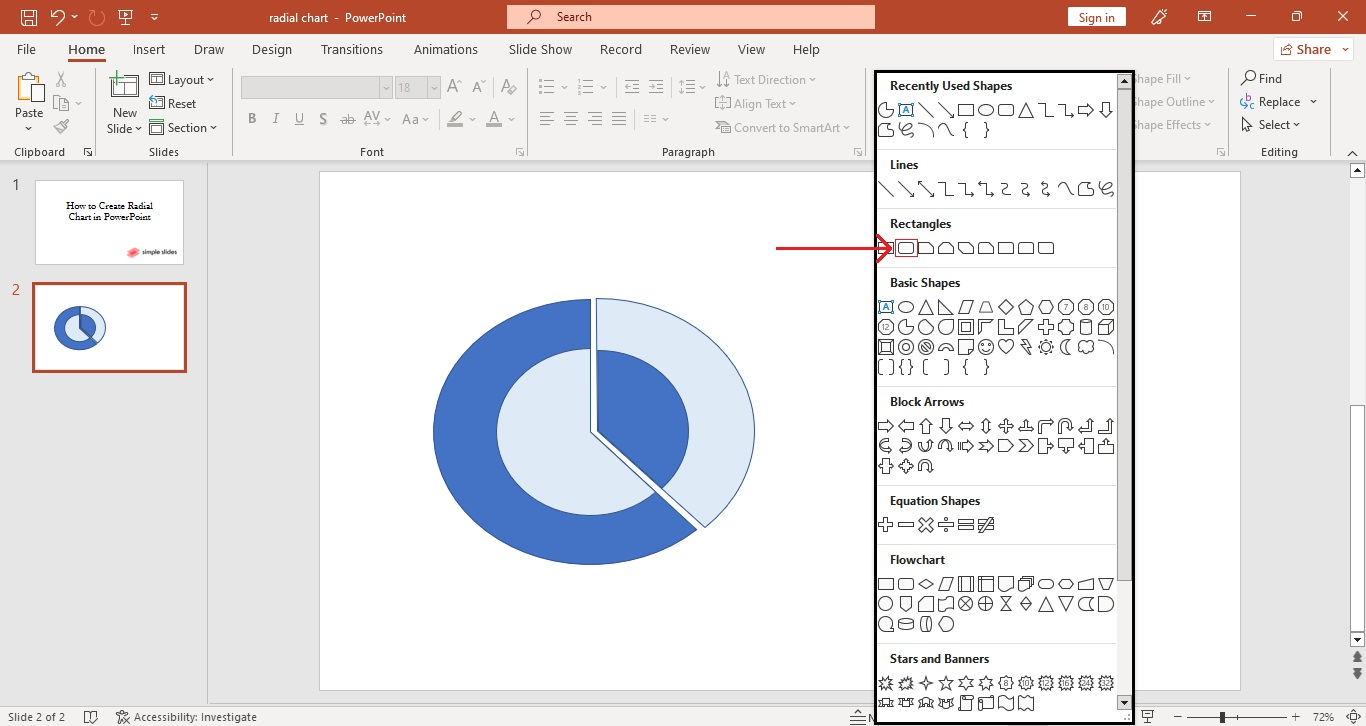
Go to the "Insert" tab and select "Shapes" from the "Illustrations" section.
-
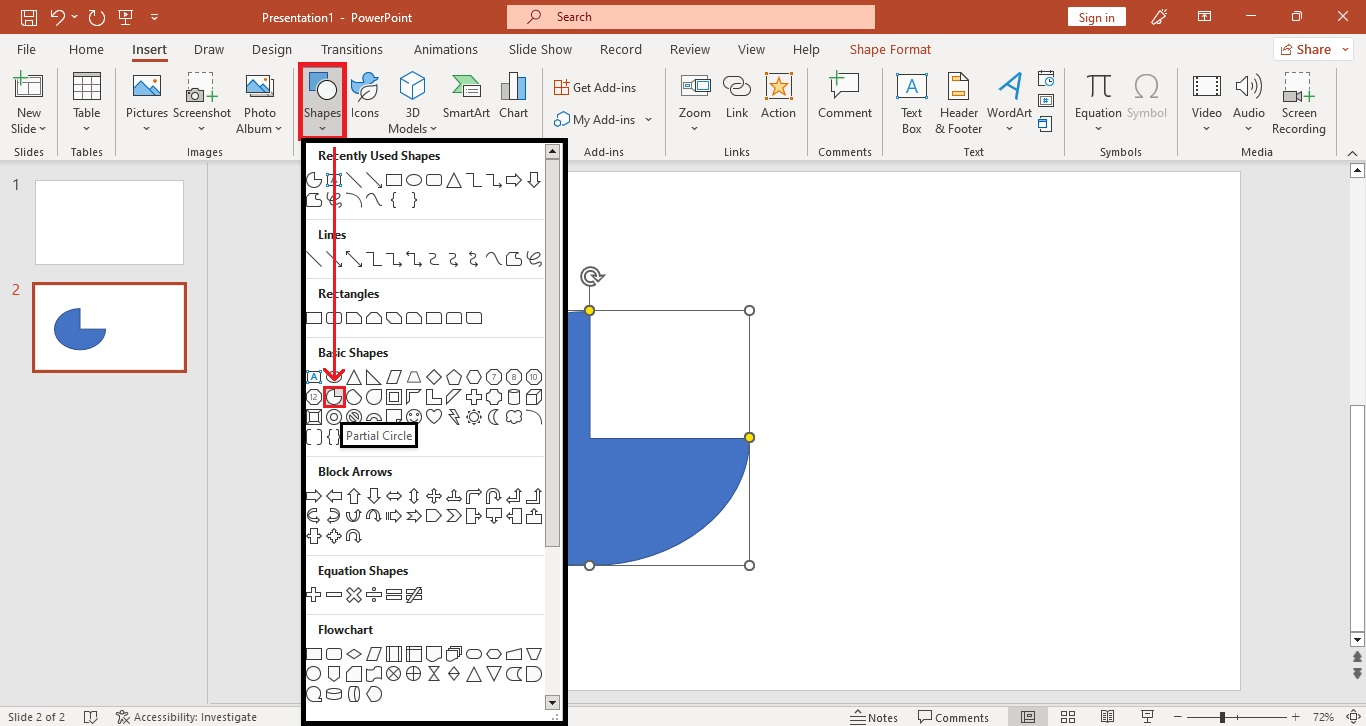
Select the "Partial circle" shape from the "Shapes" drop-down menu, and drag it to your slide deck.
-
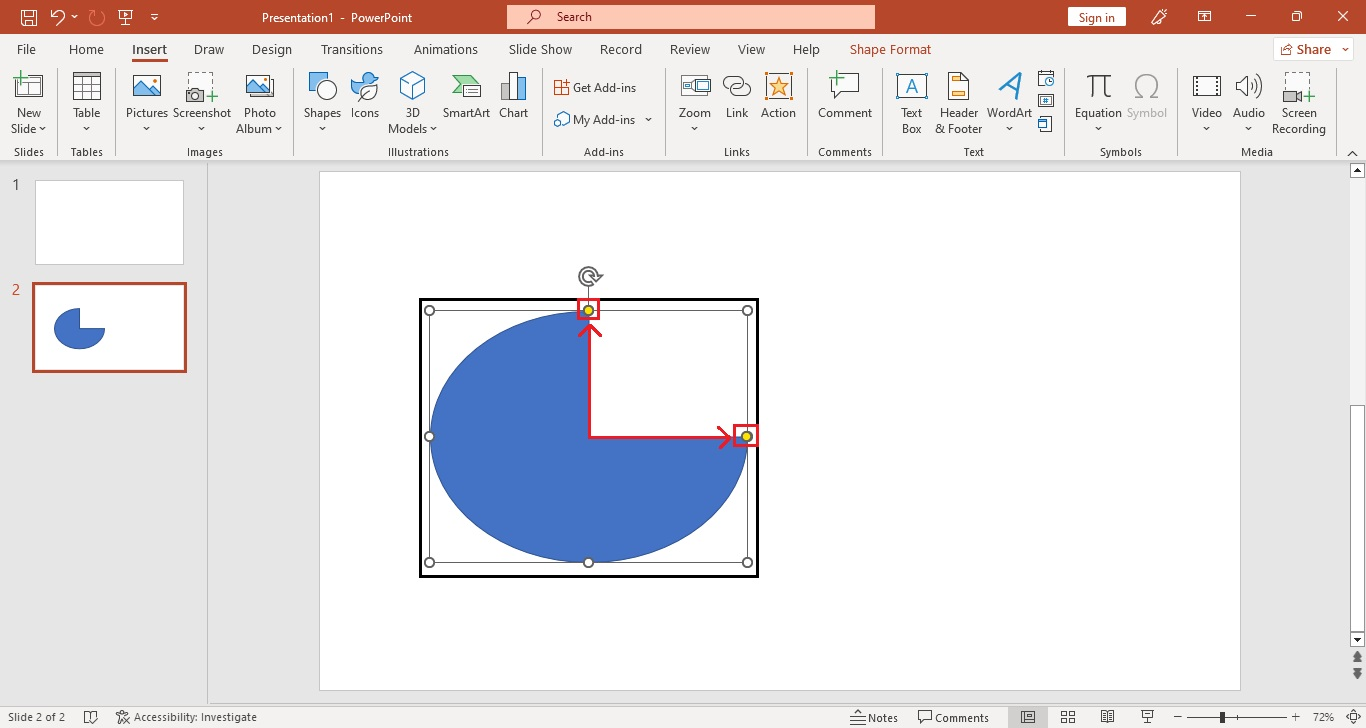
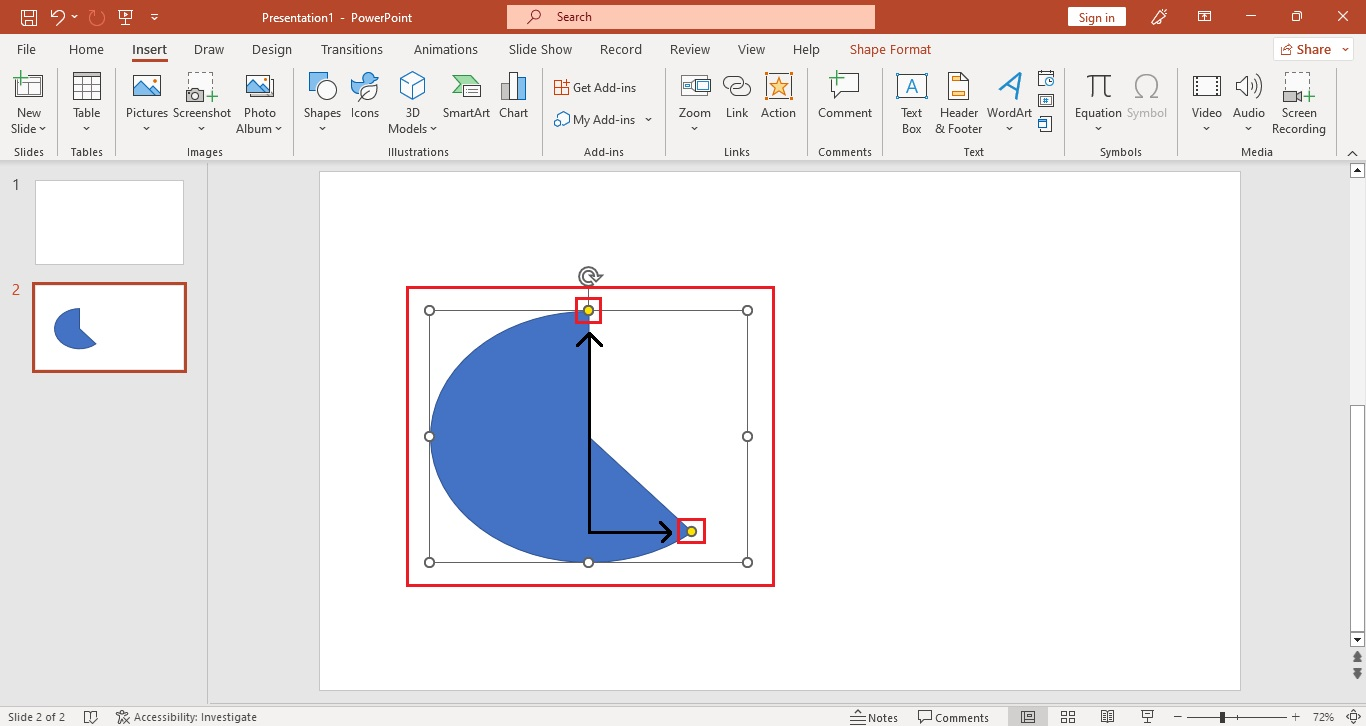
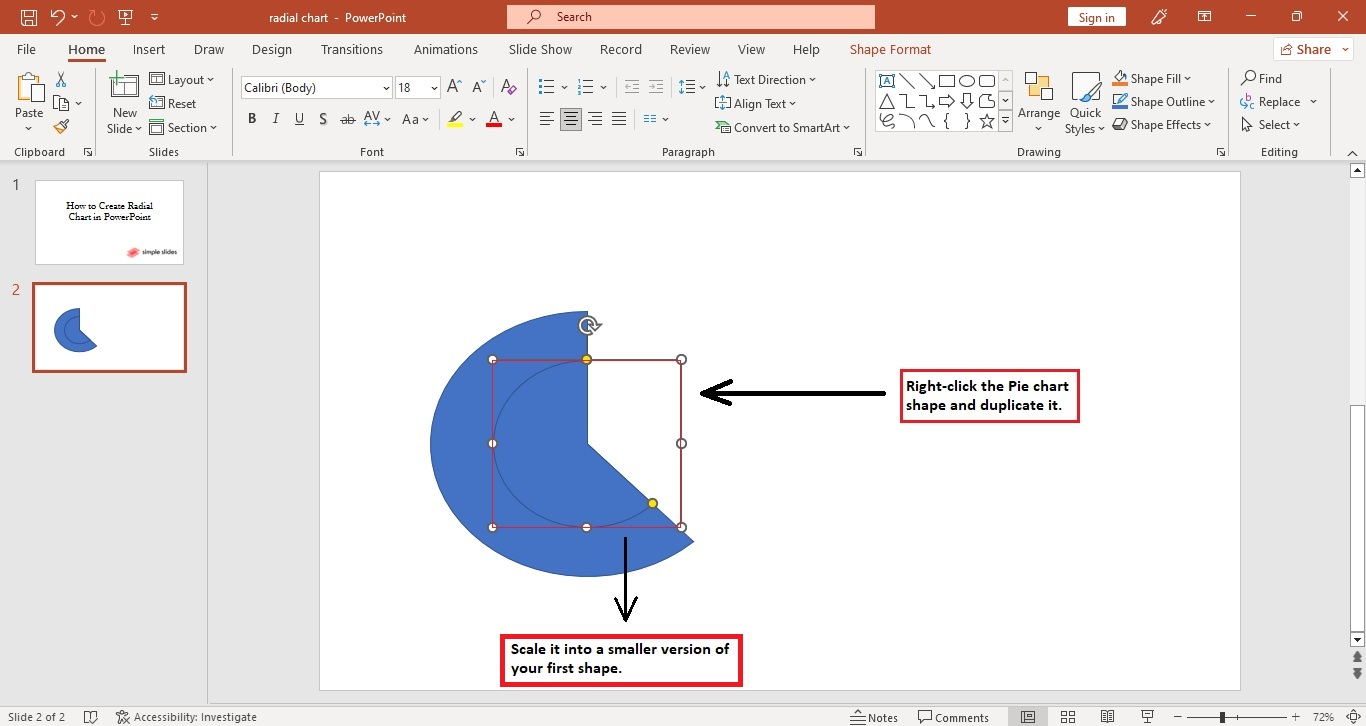
To scale your partial circle, click the shape and notice the two yellow dots at the sharp corners of the circle.
-
Select and drag the other end (yellow dot), then scale your shape.
-
Once you've scaled the shape, right-click the partial circle and duplicate it. Then, position the duplicate shape over the first shape and ensure it is properly synced.
-
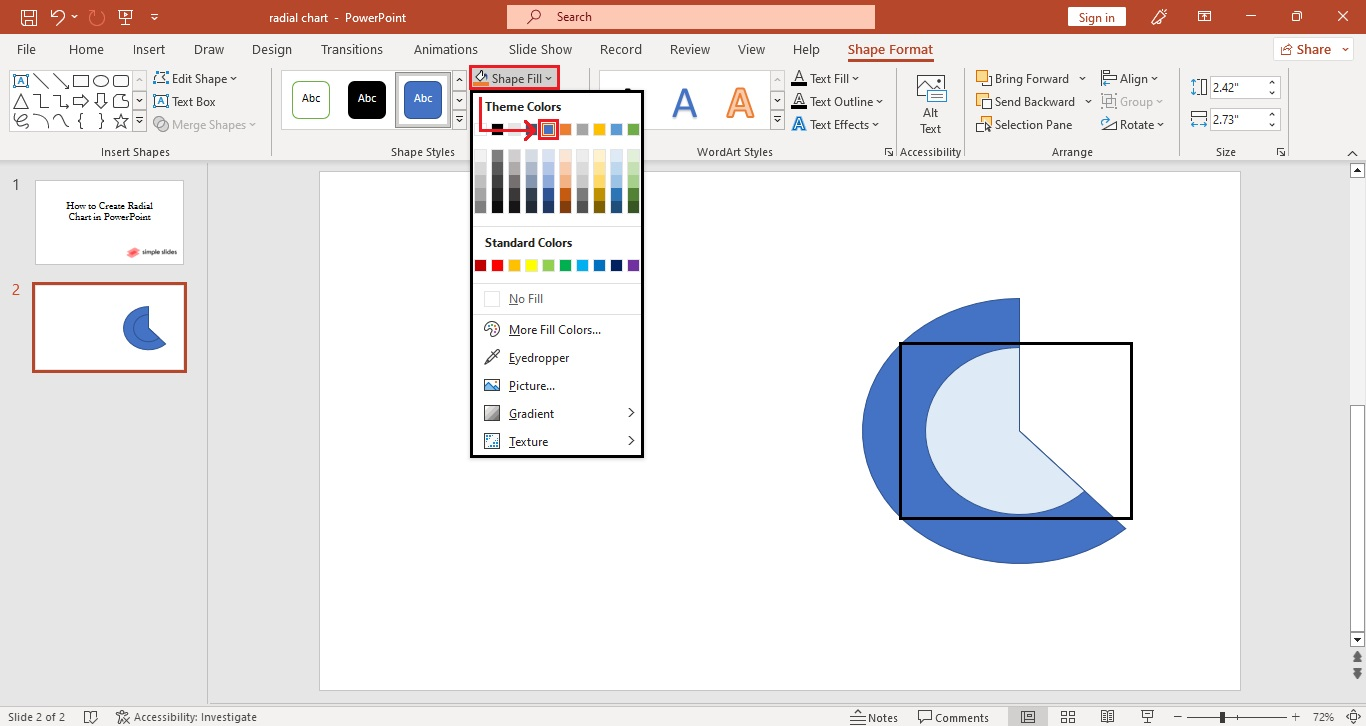
To distinguish the duplicate shape, click it and go to the "Shape Format" tab. Select the "Shape fill" and choose a specific color for it.
-
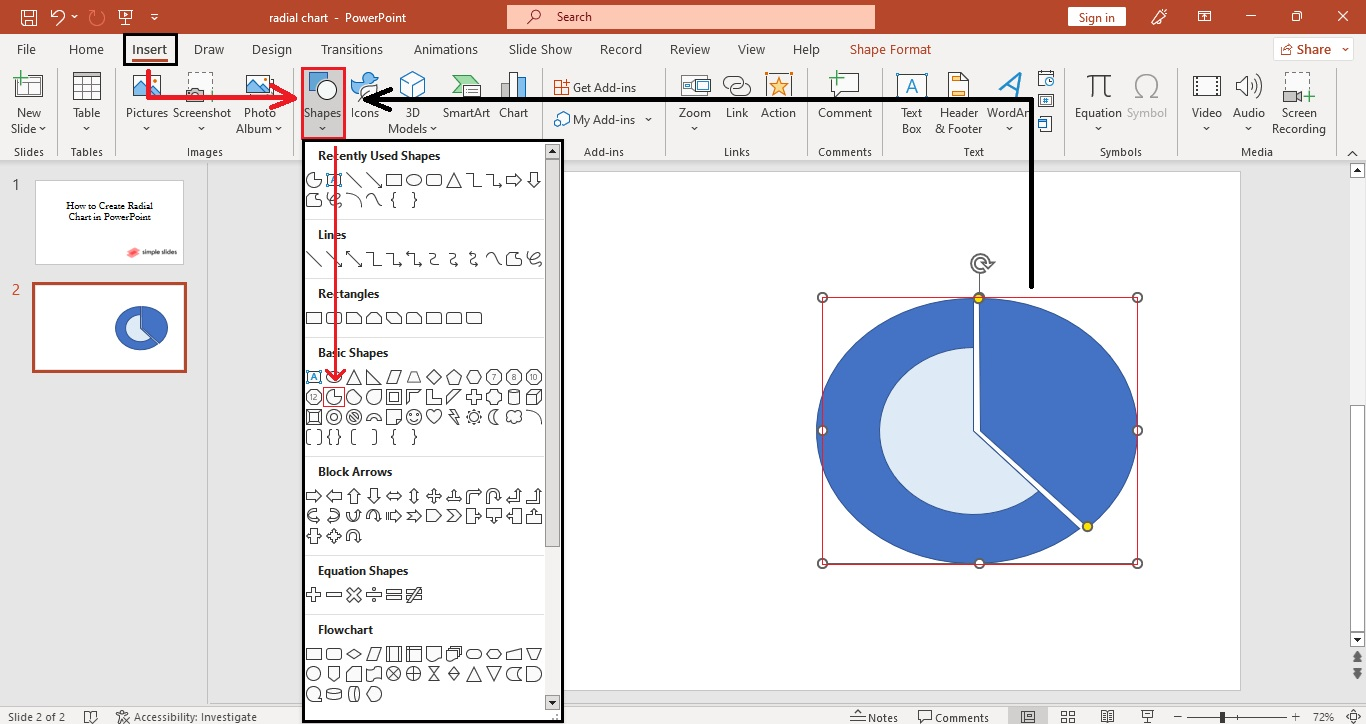
Then, go to the "Insert" tab, then select "Shape." Choose "Partial circle" from the "Basic Shapes" options.
-
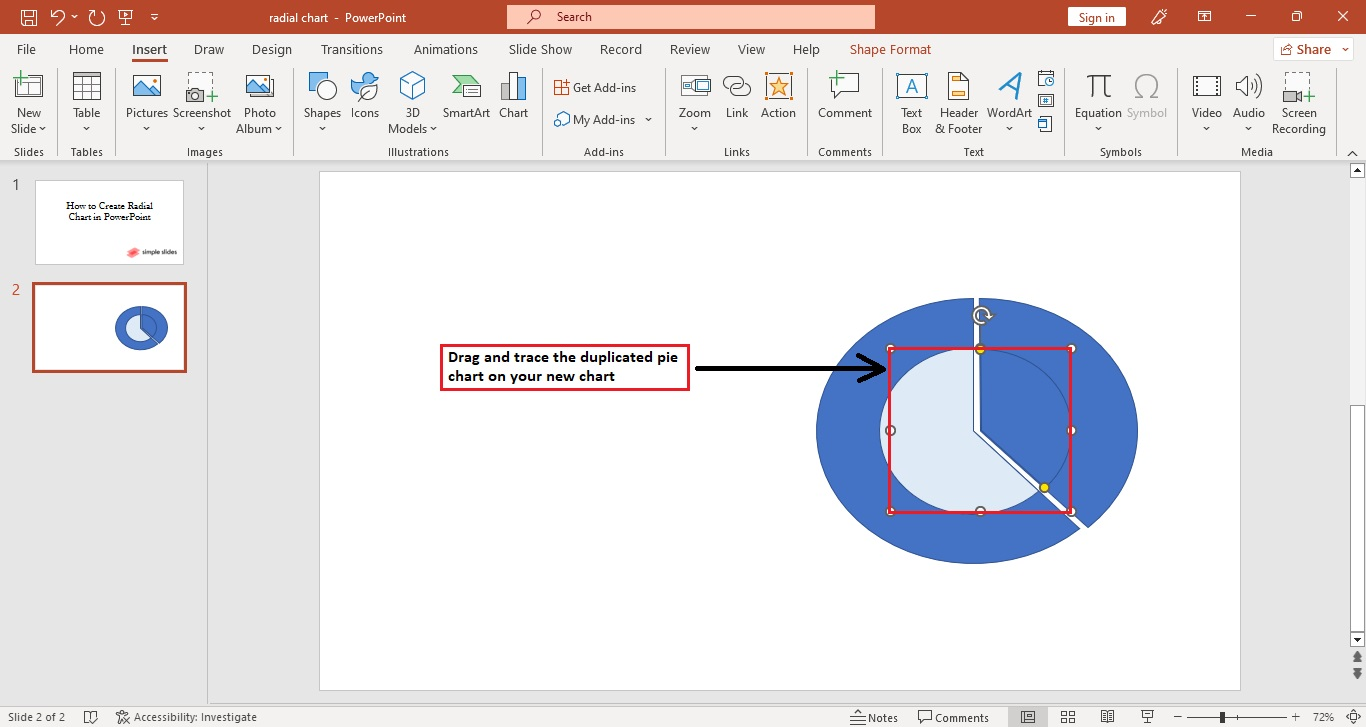
Drag and trace the other partial part of the pie from your slide deck, then adjust it until you get the whole picture of your radial chart.
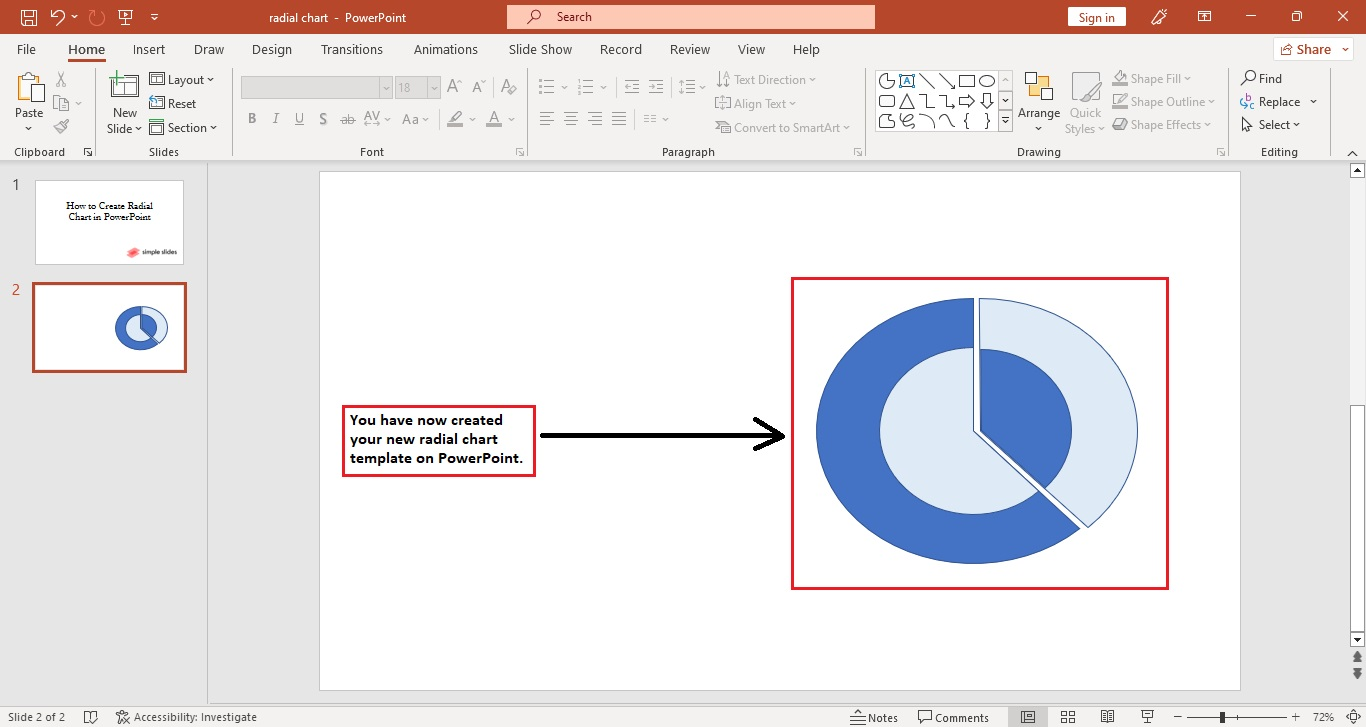
-
You have now created your icon for your radial charts PowerPoint templates.
Quick Tip: Check out our blog post about adjusting the transparency of shapes in your MS PowerPoint for more detailed instructions.
Add Labels to Your Radial Chart
To insert data labels into your radial chart, follow these instructions:
-
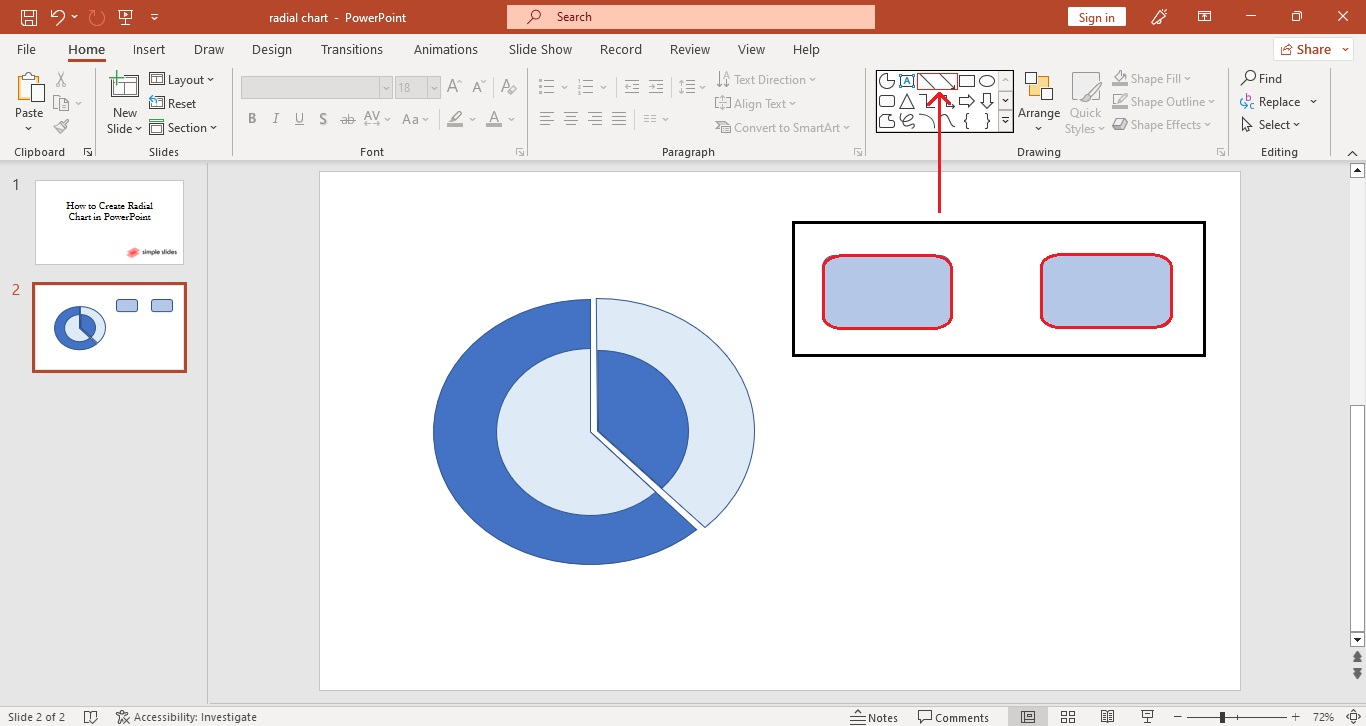
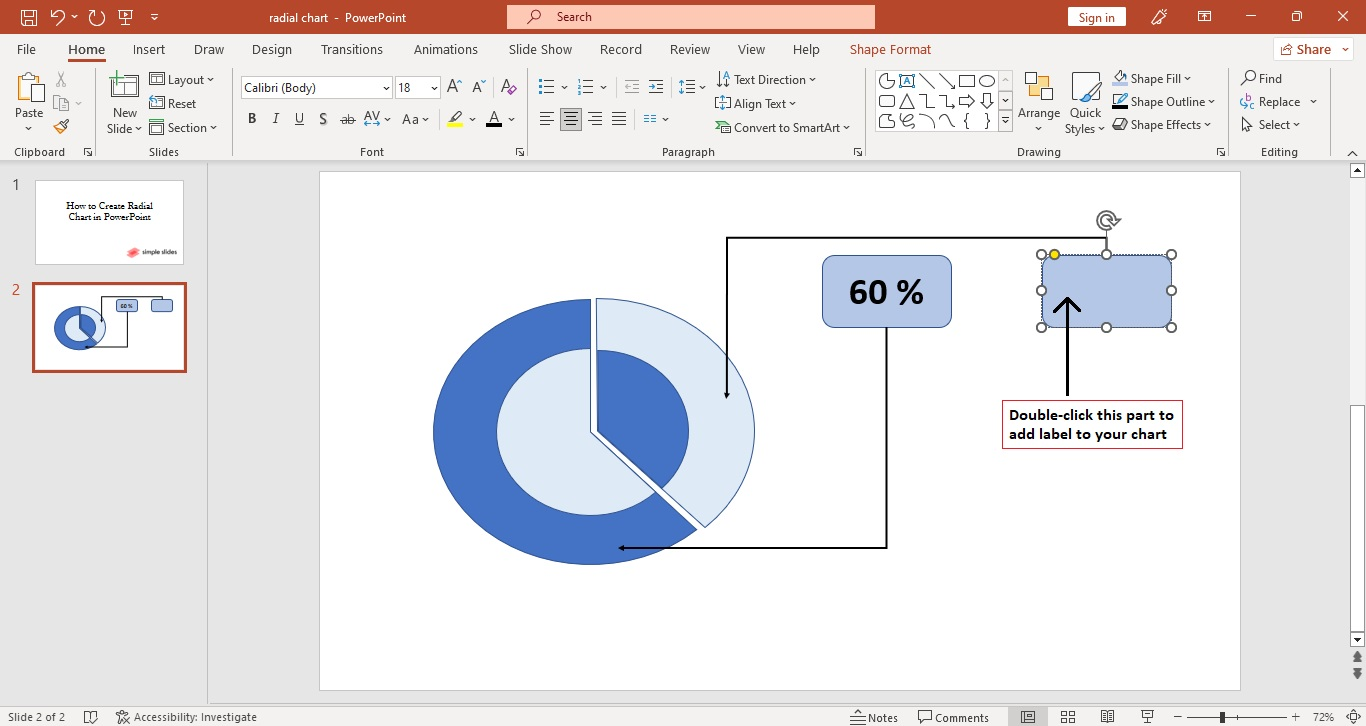
Select the drop-down menu for shapes from the "Home" tab of your PowerPoint presentation and choose a specific shape from the "Basic shapes."
-
Click and drag the particular shape near your radial chart and select "Lines" to connect your data.
-
Once you've connected the rectangular shape to your radial diagram, double-click the shape and type its respective labels for your radial chart.
-
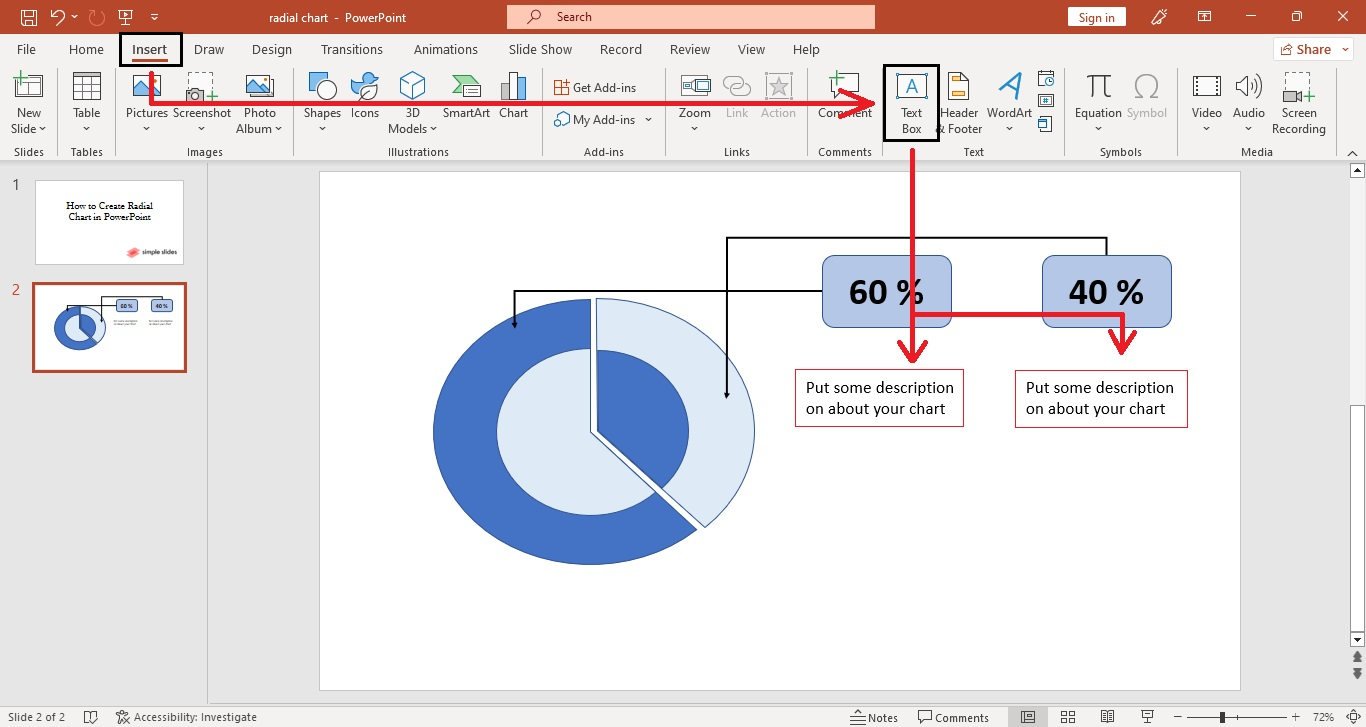
Go to the "Insert" tab and select the "text box."

-
Then, insert it below the shapes to provide information and descriptions about that data.
-
After typing all the information and description, you have fully created your radial diagram on PowerPoint presentation.

Final Thoughts on How to Make a Radial Chart in PowerPoint
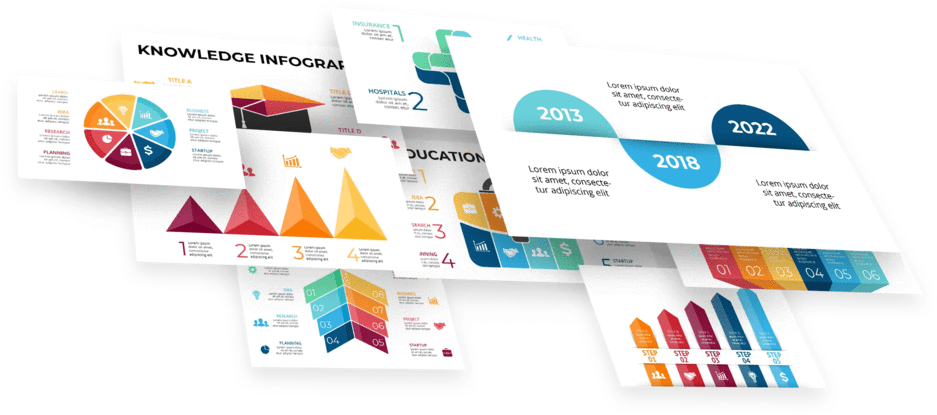
Learning to create a compelling and unique visual representation for your radial diagrams in PowerPoint can elevate how you present your data. After all, radial charts are among the best diagrams to show the significance of two similarities and standard deviations of raw data.
Perhaps you're looking for creative slides for your next business presentation. Visit Simple Slides and pay for the low, one-time fee to access over 10,000 templates and infographics. You can also watch our Google Slides and PowerPoint tutorials when subscribing to the Simple Slides YouTube channel.
Frequently Asked Questions About Creating Radial Diagrams on PowerPoint Presentations:
What are the different kinds of radial bar charts?
Here are some types of radial bar charts for presentations:
-
Basic Radial Chart
-
Multiple Radial Bar
-
Circle Charts
-
Gradient Circle Chart
-
Stroke Circular Gauge
-
Semi Circular Gauge
What are the four types of charts?
The four types of charts are:
-
Line Charts
-
Bar Charts and Histograms
-
Pie Charts
-
Cartesian Graphs
What advantages do radial charts offer?
With radial charts, you can examine the relative strengths of the various factors and the location's overall strength relative to others.
Related Articles:
5 Easy Steps to Change the Image Opacity: Google Slides
Learn How To Add a Border On Google Slides In 7 Simple Steps
Get A Free Sample of Our Award-Winning PowerPoint Templates + University
Get A Free Sample of Our Award-Winning PowerPoint Templates + University
Join our mailing list to receive the latest news and updates from our team.
Don't worry, your information will not be shared.
We hate SPAM. We will never sell your information, for any reason.