
How to Make a Photo Slideshow on PowerPoint
May 21, 2021PowerPoint is a powerful tool for presentations, but also for Photo Slideshows. Think of it like the live-still photo frames in Harry Potter. Indeed, they used PowerPoint as the software for that mystical moving frame.
This tutorial will walk you through How to Make A Photo Slideshow.
Go to the tools ribbon and click Insert. From the options under Insert, select Photo Album. Once clicked, a pop-up window displays all the settings for adjusting your Photo Album.
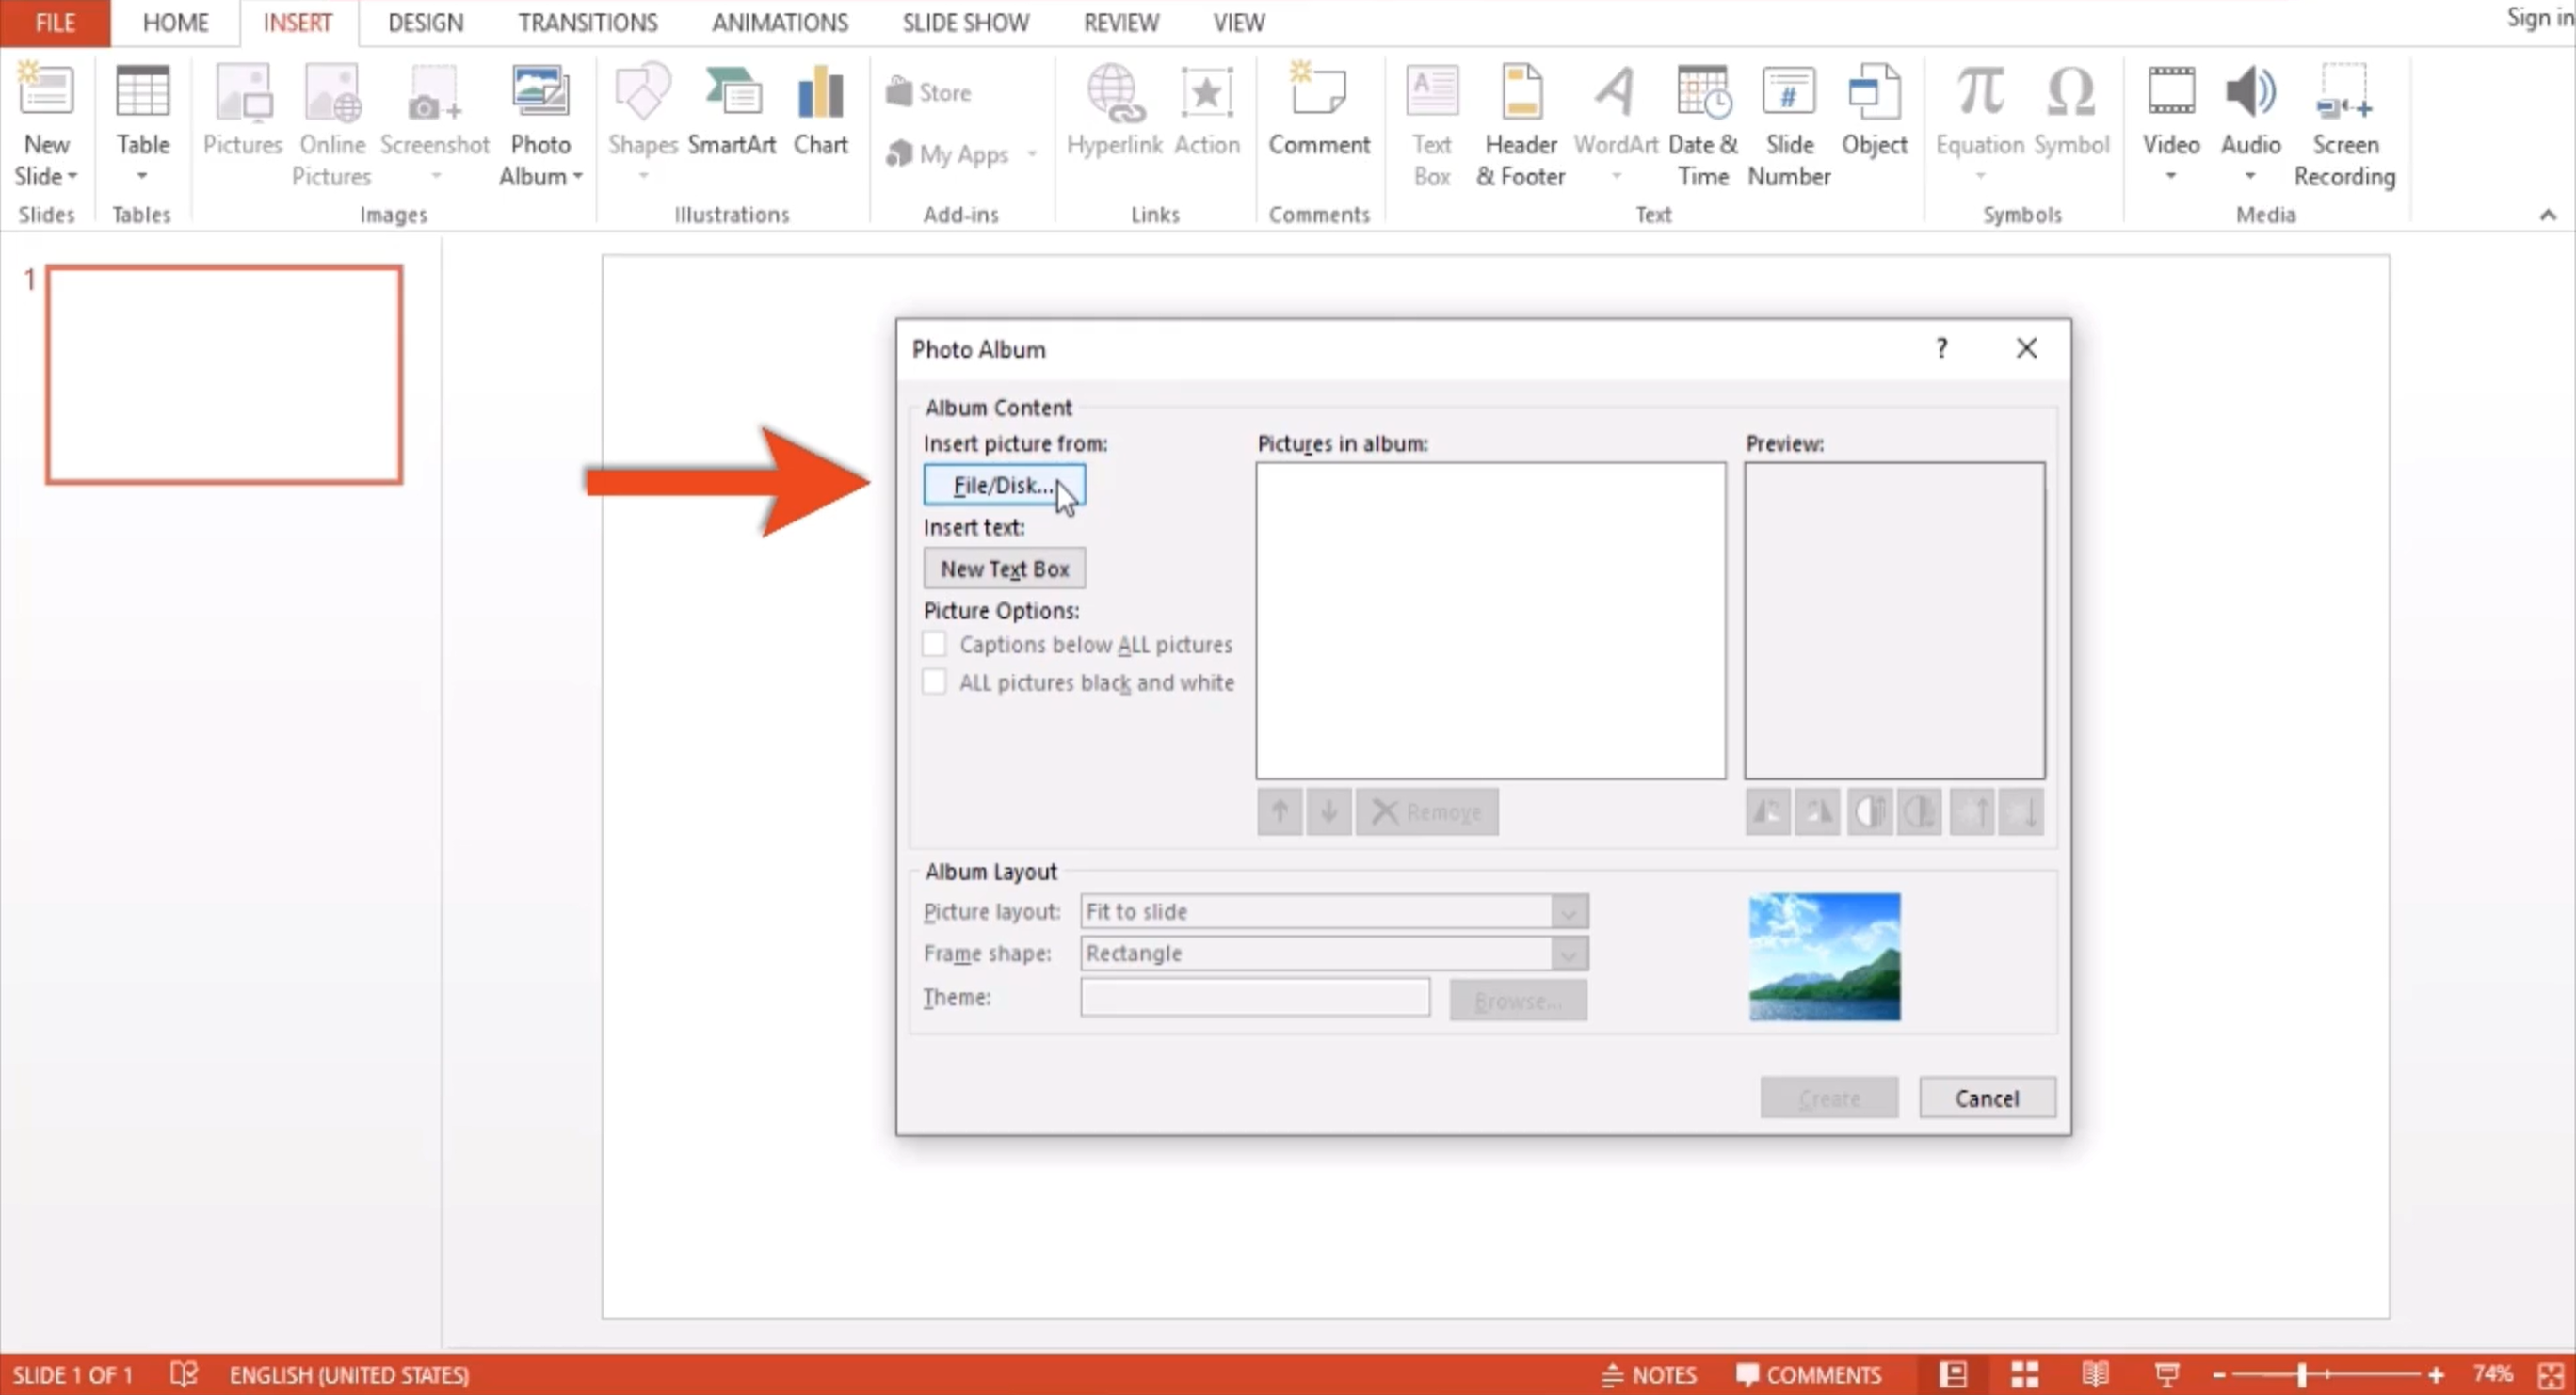
To insert our pictures, click the button in the upper left corner labeled File/Disk. Select the photos you want to use from your computer. Once selected, the photos will all be displayed on this box labeled Pictures in Album.
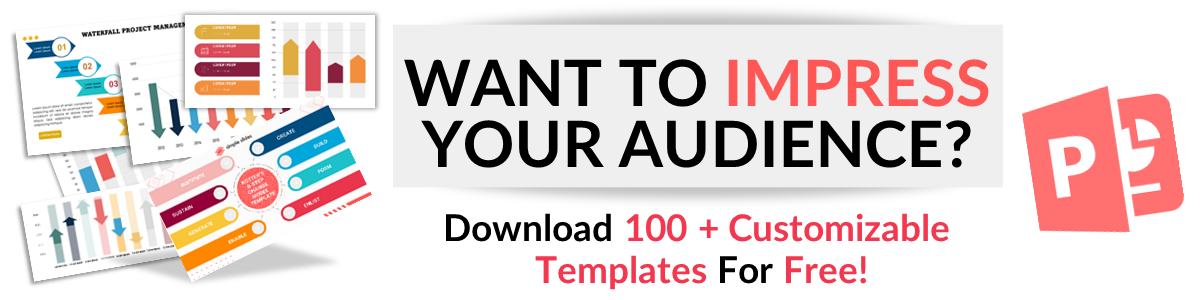
The pictures are all numbered according to the order in the presentation. They also have boxes placed before them which you can select to adjust using specific settings, such as moving up or down, rotating the image, and changing its brightness and saturation.

For example, I want to move image number two to the first slide. I tick the box and click on the up button. If I want to rotate the image, I can easily use these rotate buttons on the side, and if I want to change the brightness, I also have some tools here for that.
Under Album Layout, there are three tools you can use to adjust your slides and images. It has this Picture Layout option, allowing us to place more than one image on a slide as we see fit.
For example, if I want two images on each slide, I click on this button next to Picture Layout, which will give us a drop-down of options. From there, select the one that says two pictures, and it will automatically arrange the album to have two photos on each slide.
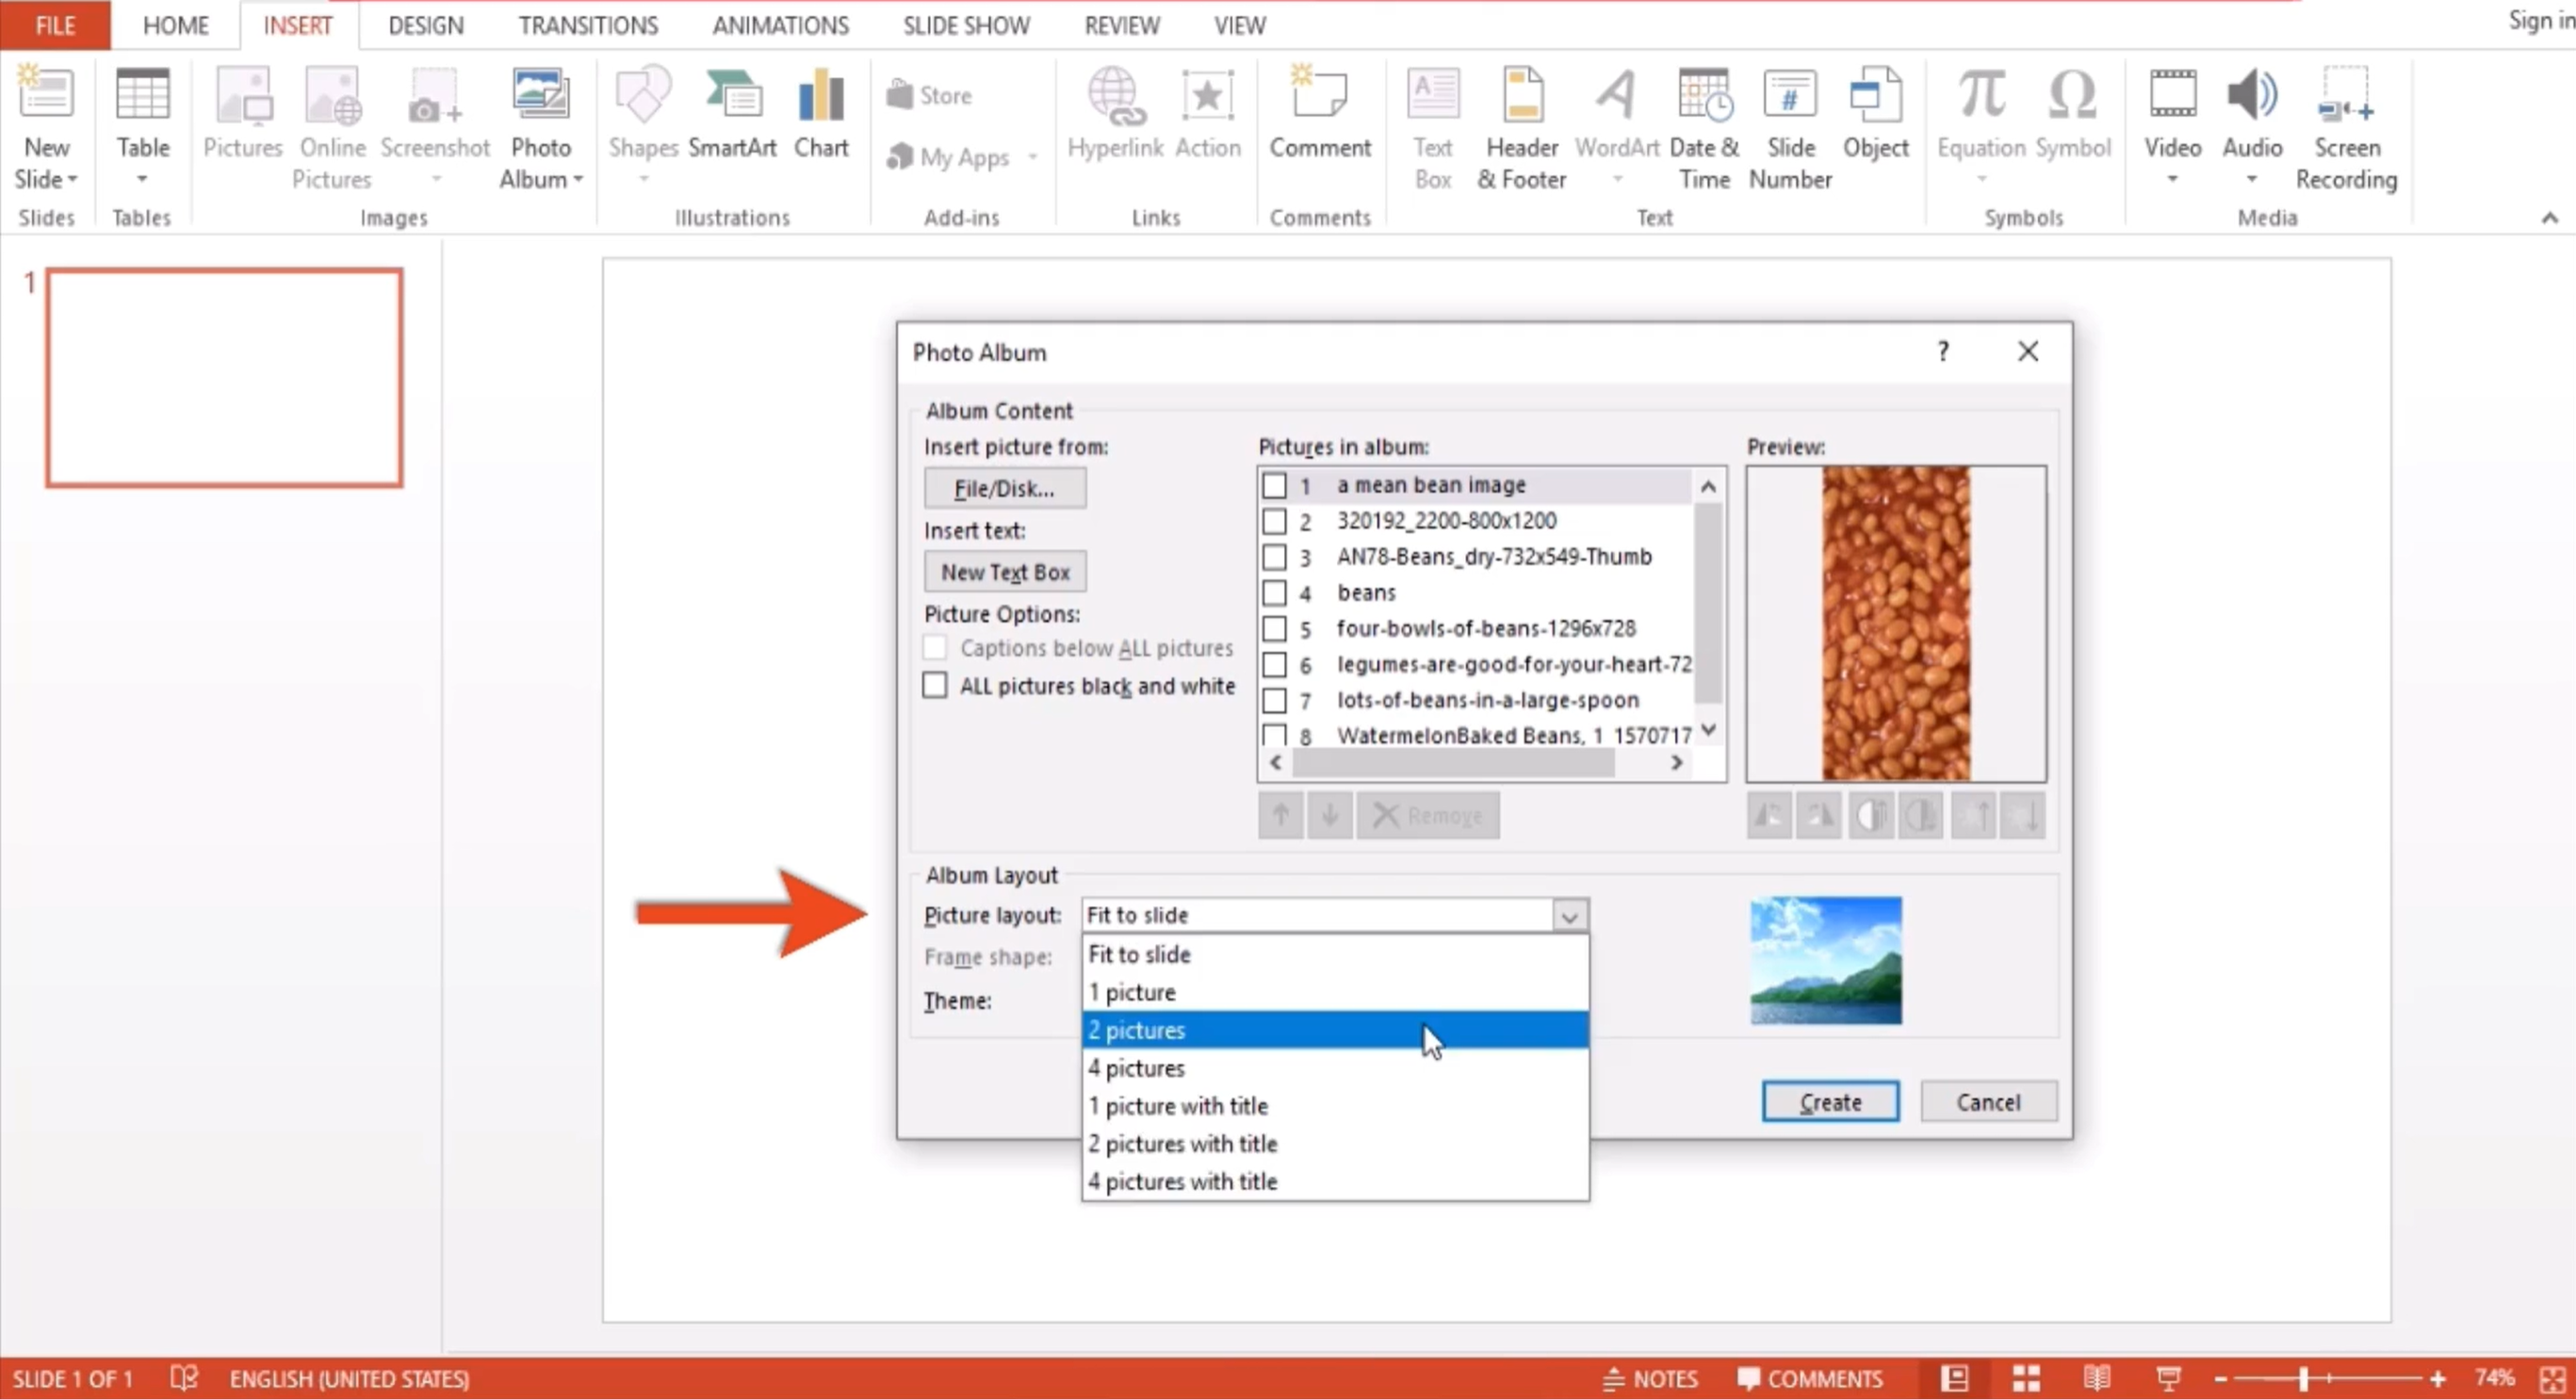
Under Picture, Layout is an option to change the Frame Shape. Clicking on the small V-shaped button shows us a drop-down of the frame options you can choose to reshape your images. I chose a rounded rectangle for this presentation.
We also have the option to select the theme for our slides. Once clicked, it will open a window showing a folder with all the themes we can use. For simplicity’s sake, we will use the default one.
For our final presentation, I wanted our slides to only have one picture on each slide, so I went back to Picture Layout and selected 1 Picture. Now that it’s back to this format give each image a caption below.
Go to Picture Options and click on the box that says Captions Below All Pictures. The images will be captioned with their default image names, but you can edit them once you have created the Photo Album.
Other options on this window include Insert text, with a button labeled New Text Box. It adds a textbox with a box you can check on to move up and down the order of slides and other adjustments.
We also have this box that says All Pictures Black and White, which, as its name suggests, will turn all the pictures black and white.
Now that I have adjusted my Picture Album, click Create, and voila!
First, we are greeted by our initial slide, which has a default title of Photo Album and a subtitle that cites the author, which by default is the name of your computer.

We can easily edit this by clicking on the text box and typing in the title and name of your choice.

A text box displaying their default names is found beneath each picture for the image slides. You can also easily change these by clicking on the text box and editing the name to your liking.
If you are not satisfied with the format of your slides, you can go back to the Insert tab and click Photo Album, where you can choose the Edit Photo Album button to reopen the pop-up window and readjust your presentation. Once satisfied, click Update, and you’re all set.
Now that you have the basics of your Photo Album, you can add some animations, transitions, and other cosmetics to make your presentation awesome.
I made this Photo Album as simple as possible to show you the basics. Now it’s time to check out what our Photo Album looks like as a slide show presentation.
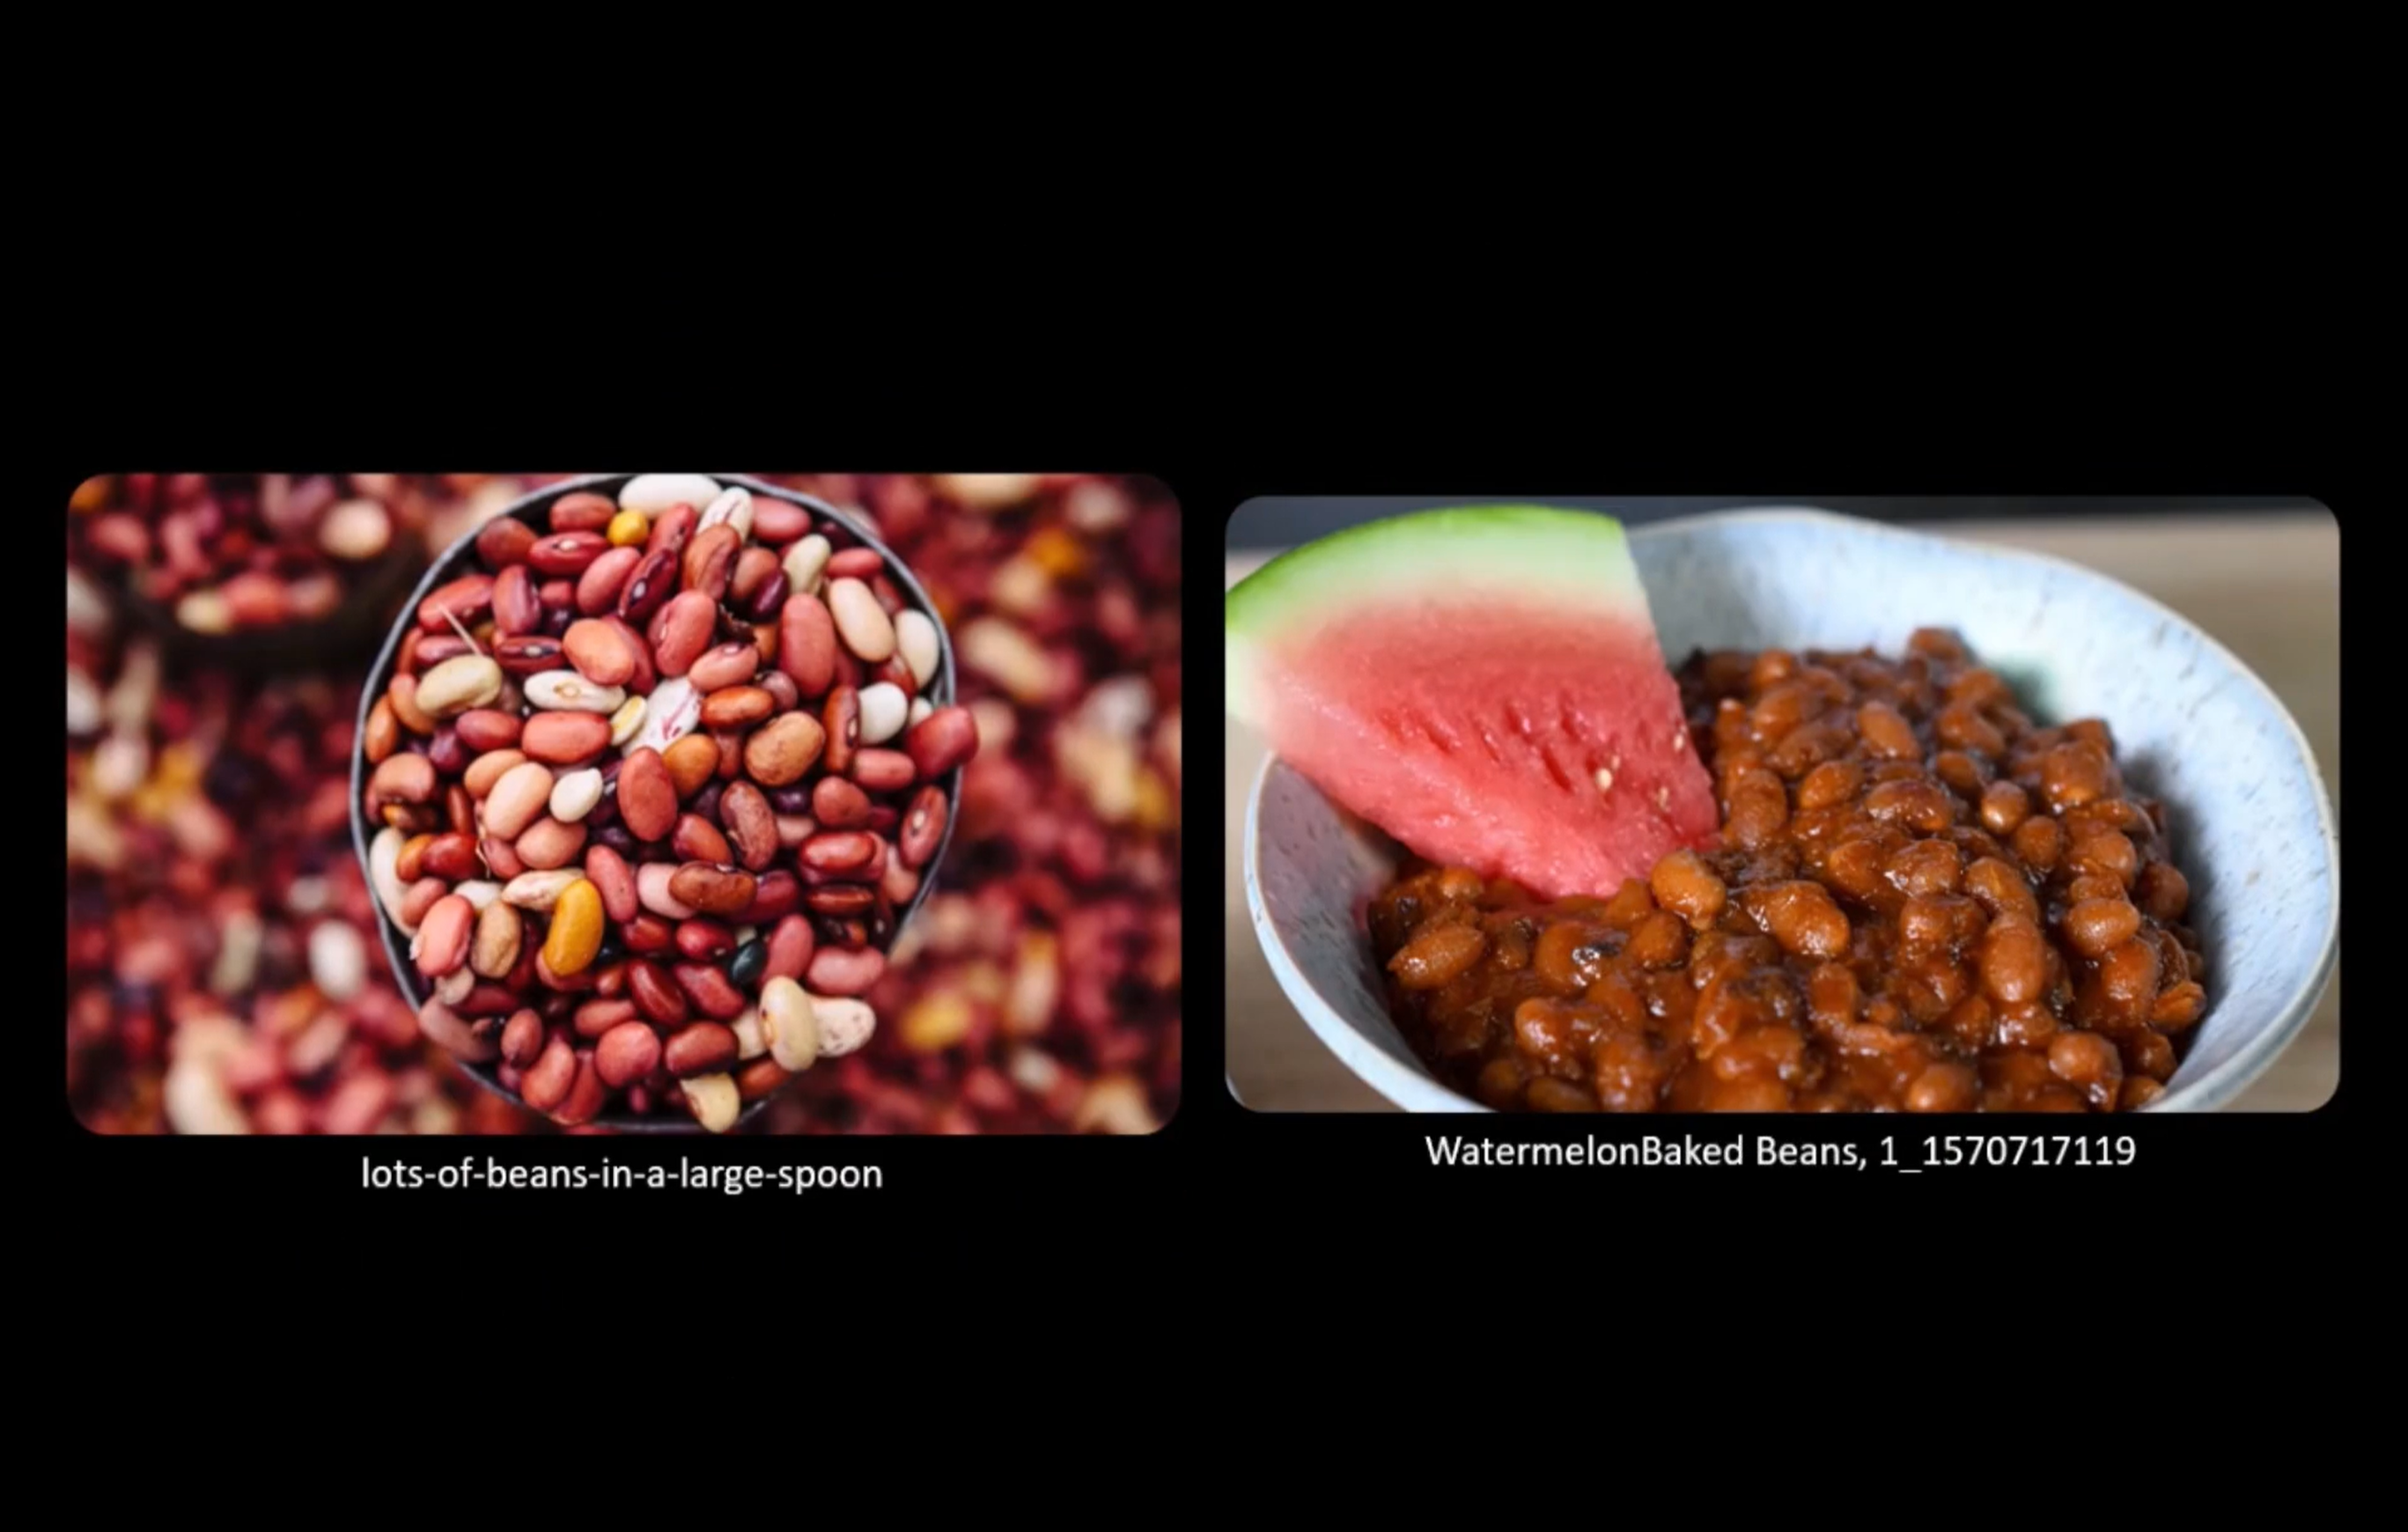
This is how the presentation would look if we chose the two pictures in one slide option under Picture Layout.
For more spectacular tips on utilizing PowerPoint, follow us on YouTube or read about How to Use Slide Master and How to Add Pop-Up Text to your presentations.
Get A Free Sample of Our Award-Winning PowerPoint Templates + University
Get A Free Sample of Our Award-Winning PowerPoint Templates + University
Join our mailing list to receive the latest news and updates from our team.
Don't worry, your information will not be shared.
We hate SPAM. We will never sell your information, for any reason.