
Insert SmartArt PowerPoint Graphics in 5 Easy Steps
Mar 01, 2023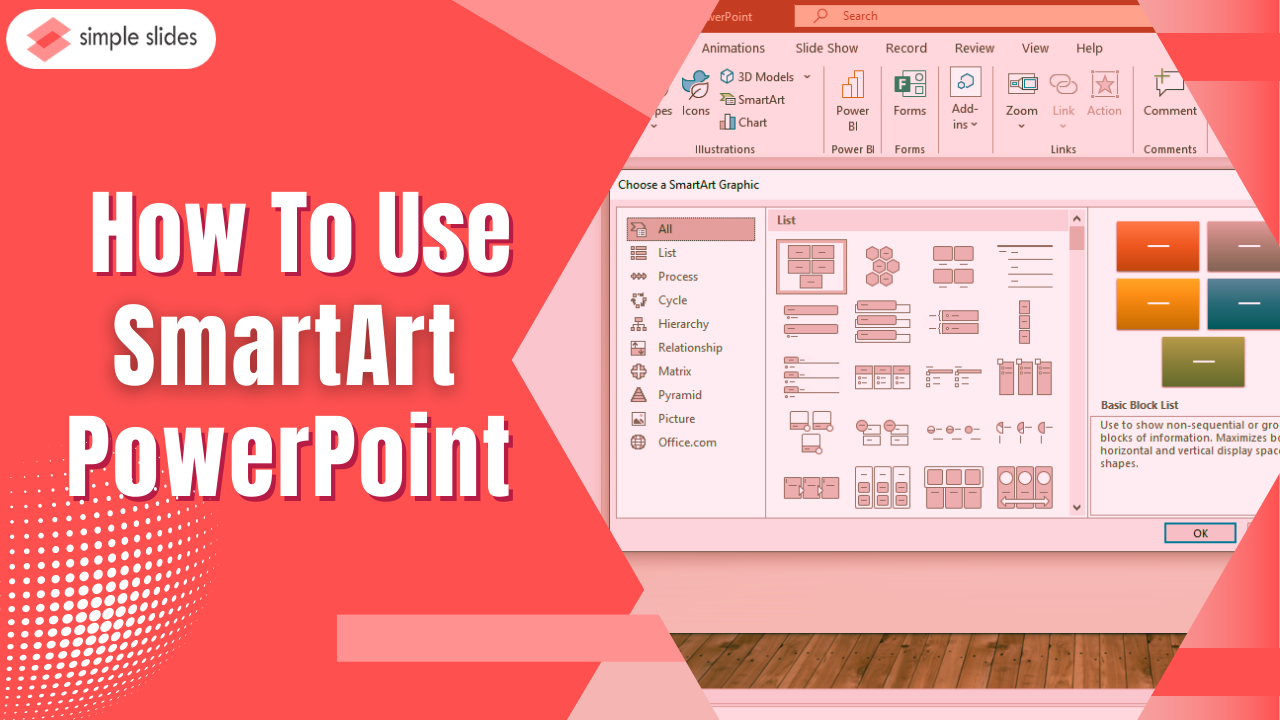
Do you need to add a visually appealing diagram and chart to your PowerPoint presentation?
Here, we will teach you how to use SmartArt Graphics in Microsoft PowerPoint and turn your bullet points into stunning diagrams!
In this article, we will walk through the following:
-
How to insert SmartArt graphics.
-
How to input text to your SmartArt graphic.
-
How to customize your SmartArt graphics.
-
How to convert existing bullet Points to a SmartArt graphic.

Learn How to Insert SmartArt PowerPoint in 5 Easy Steps.
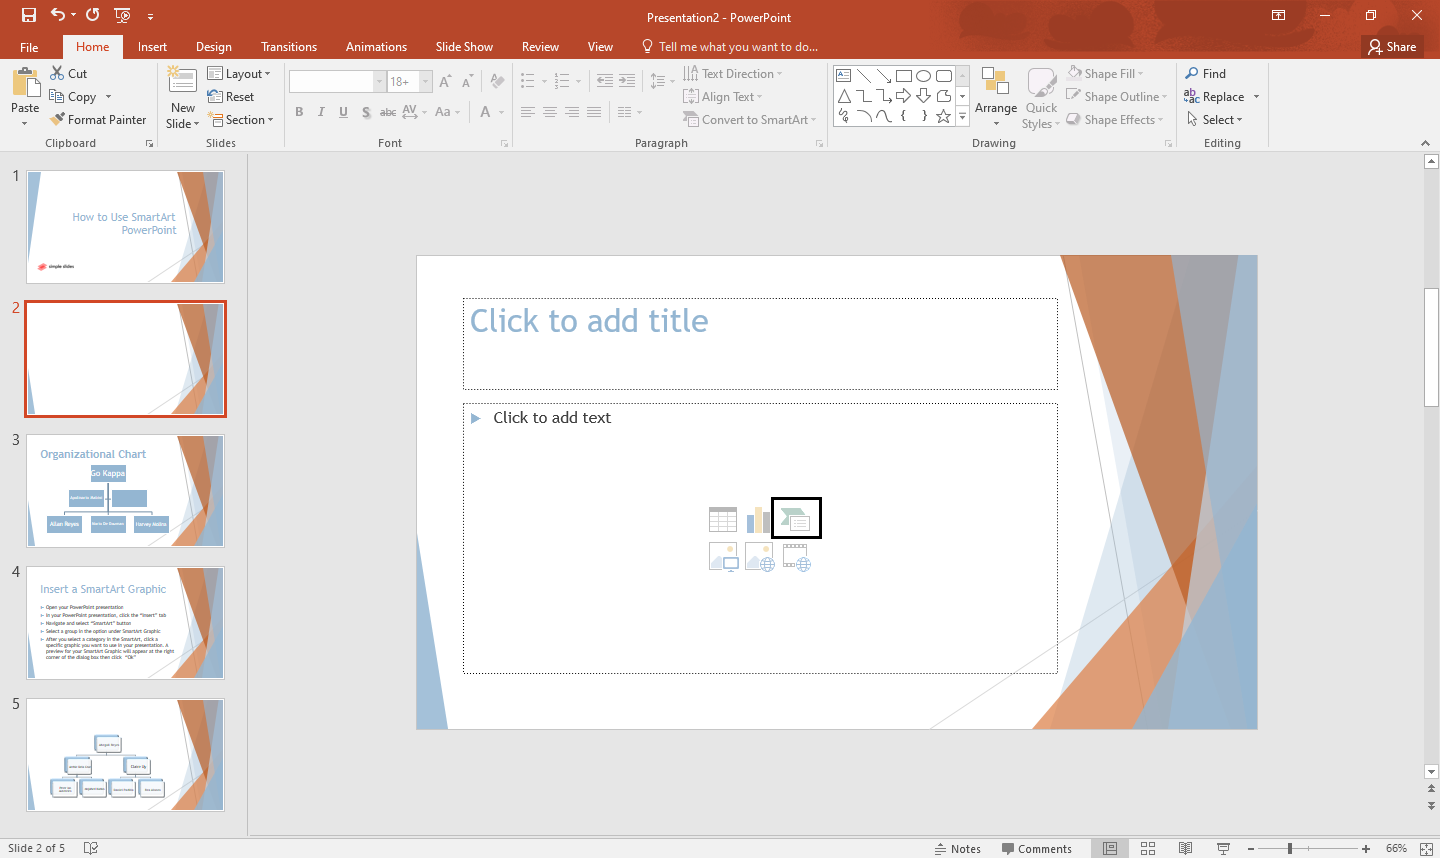
Insert SmartArt graphics.
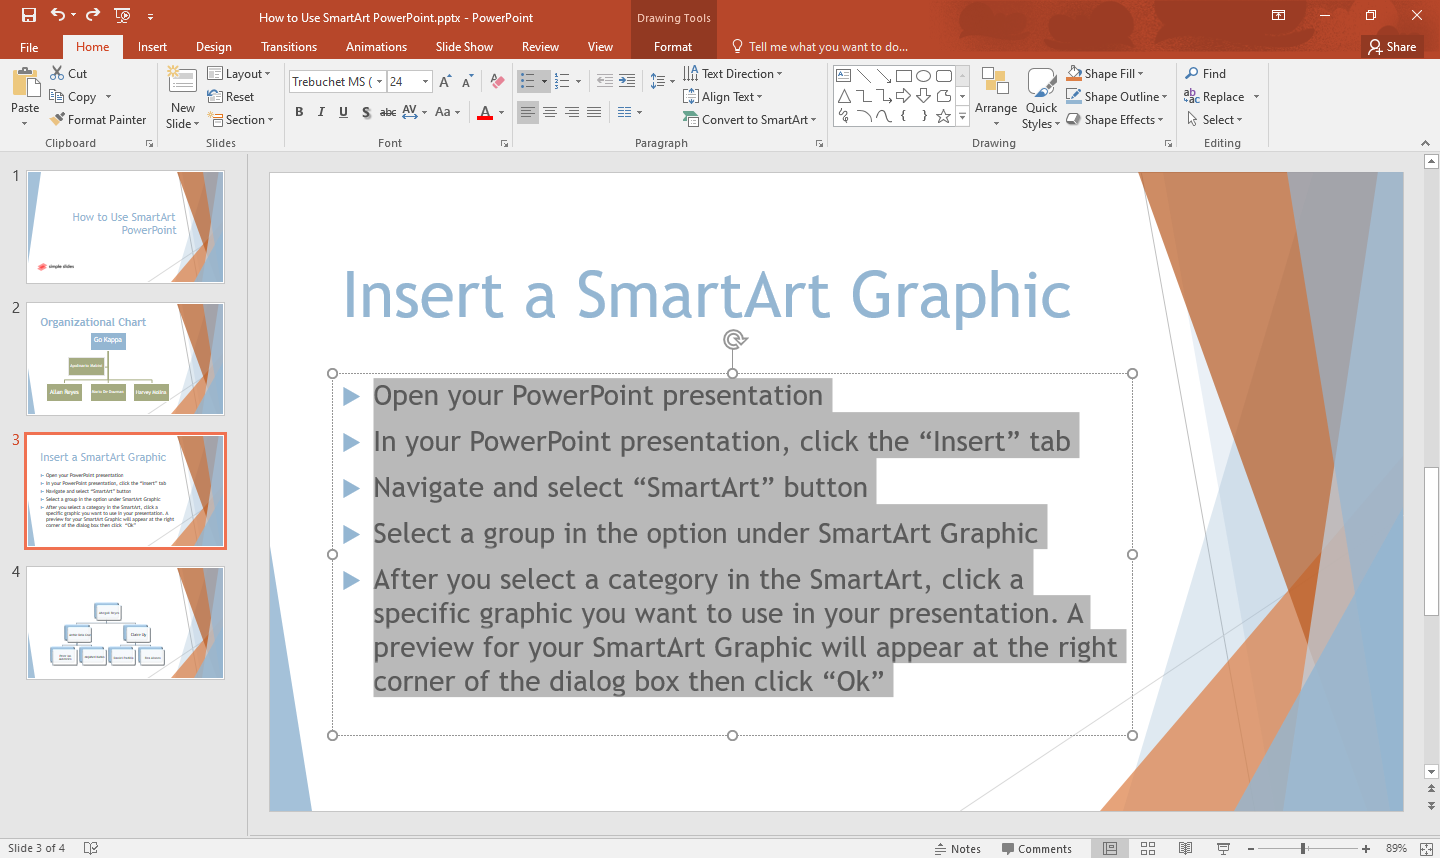
To insert a SmartArt graphic in your PowerPoint presentation, you need to;
-
Open your PowerPoint presentation.
-
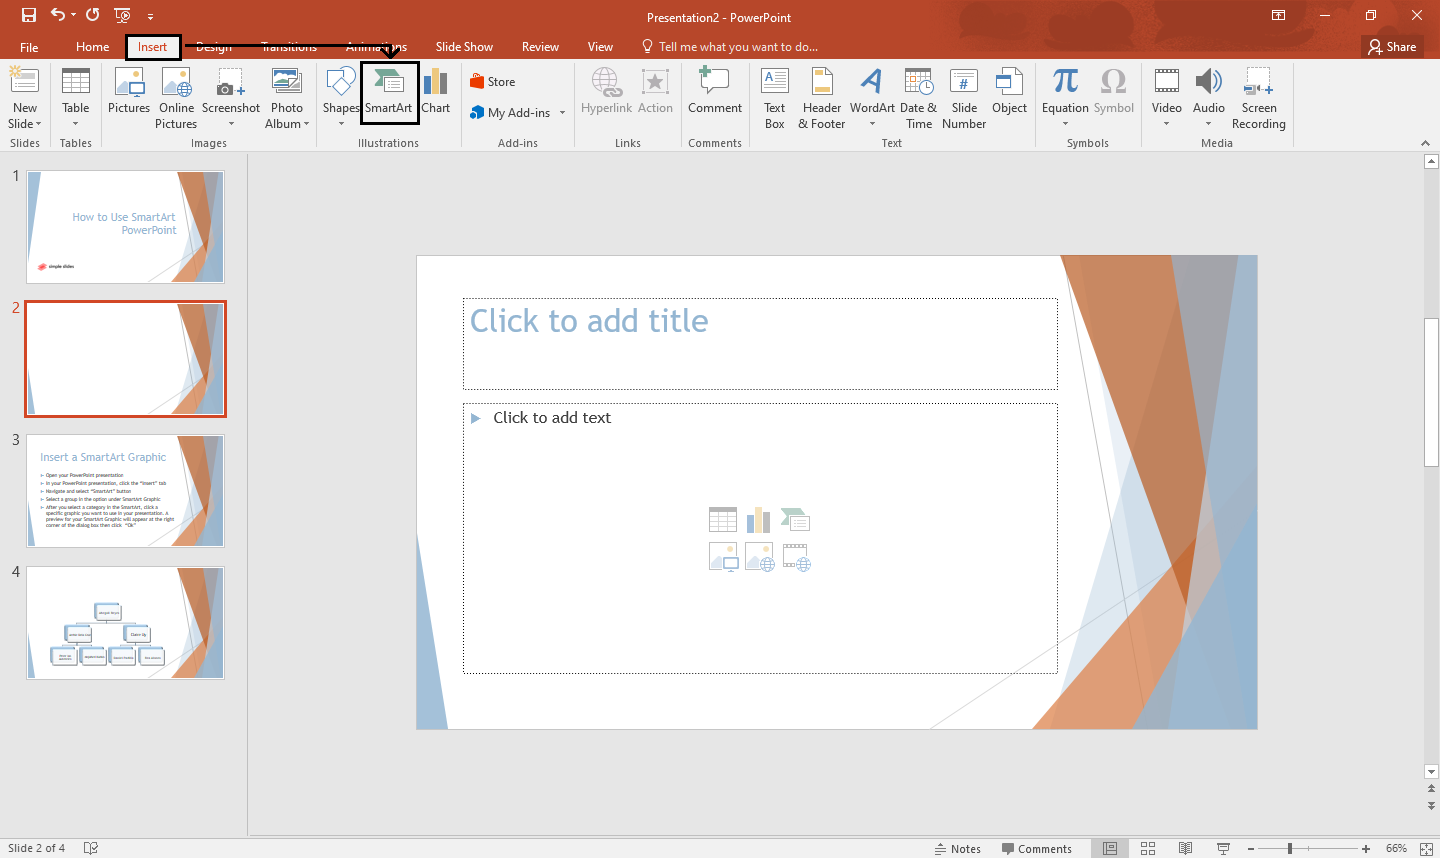
In your PowerPoint presentation, click the "Insert" tab.

-
Navigate and select the "SmartArt" button.
-
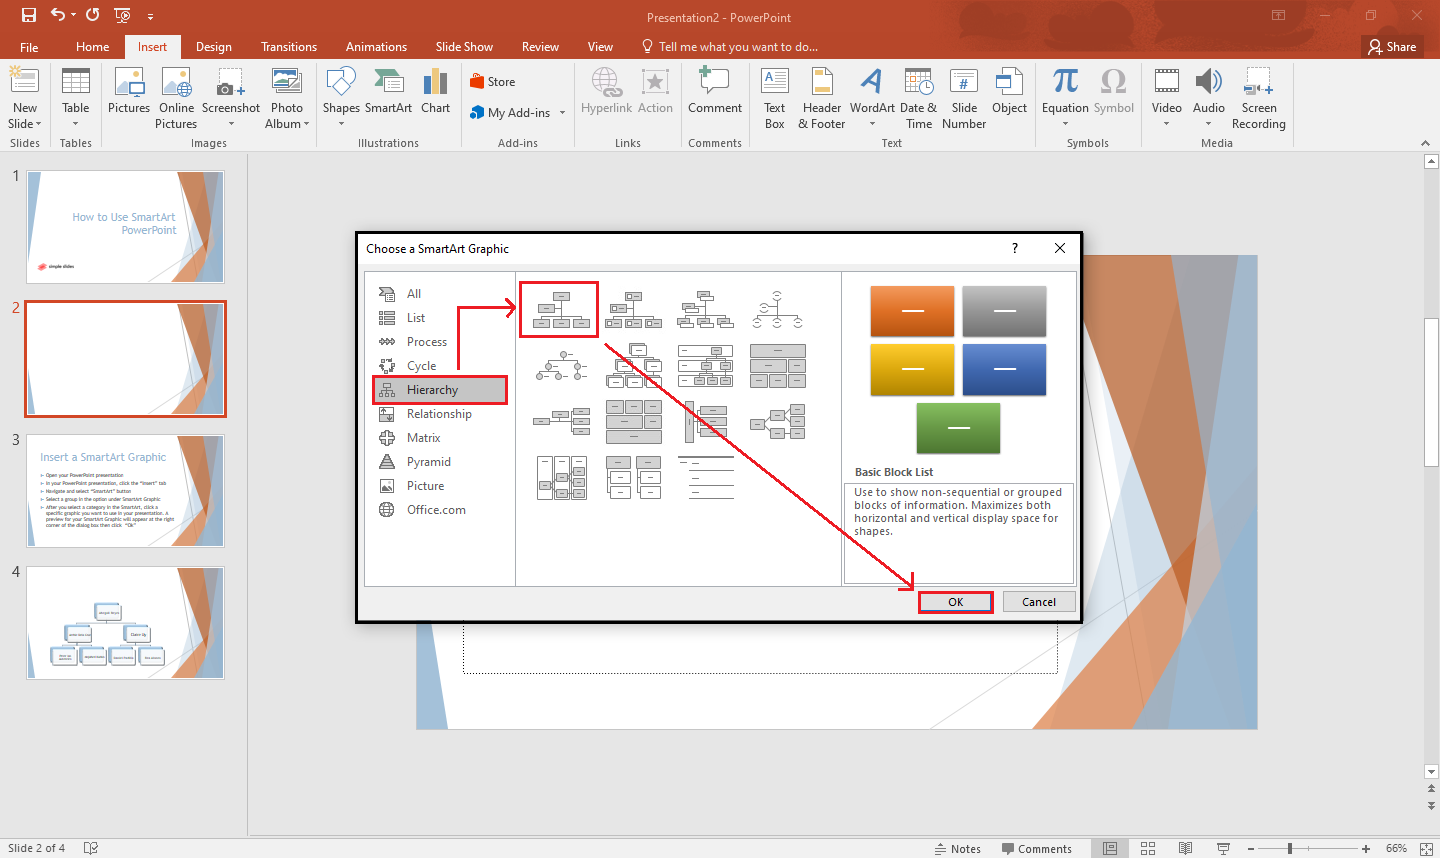
Select a group in the option under SmartArt Graphic.

-
After you select a category in SmartArt, click a specific graphic you want to use in your presentation. A preview for your SmartArt Graphic will appear at the right corner of the dialog box, then click "Ok."
Note: You can also directly insert SmartArt graphics by clicking the SmartArt icon on the layout of your presentation.
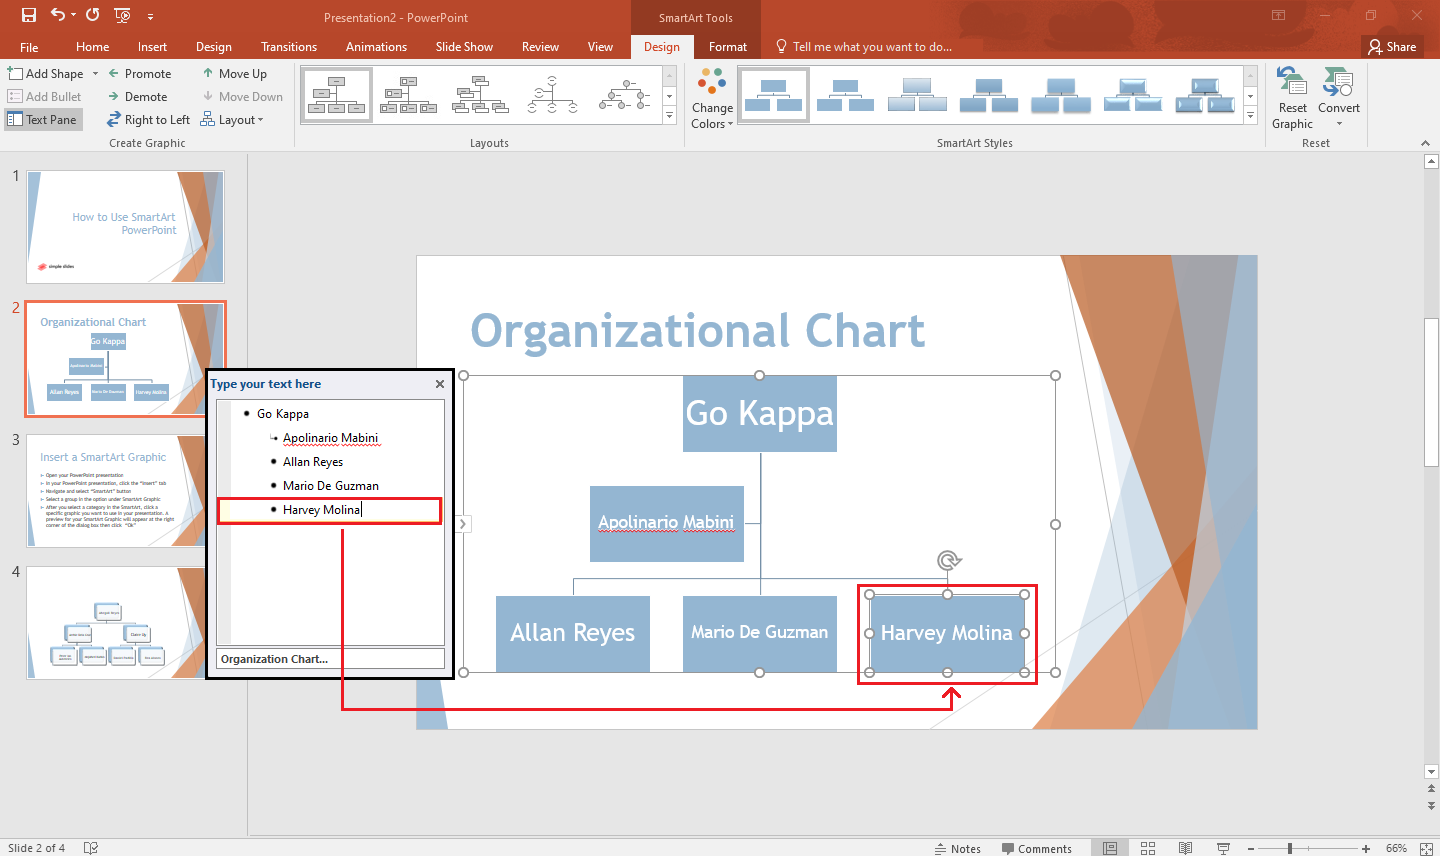
Input Text to Your SmartArt Graphic.
To insert text to your SmartArt Graphic, you can either use the text pane or use the graphic itself by;
-
Click on the SmartArt graphic, then select a particular text pane in your SmartArt graphic.
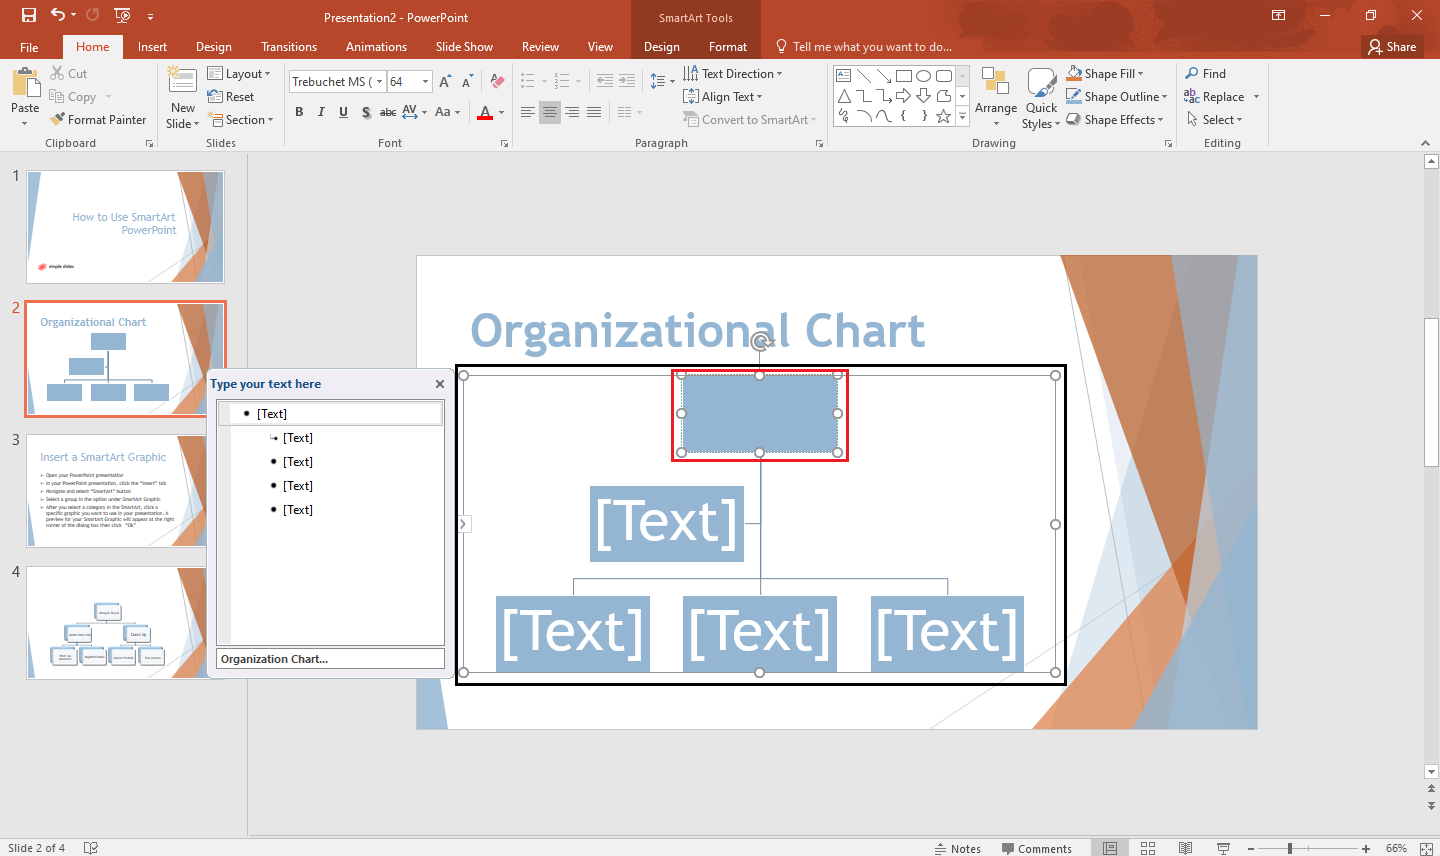
-
A dialog box for your text box will appear. Select a specific section and type the text you want to put in the text pane.

-
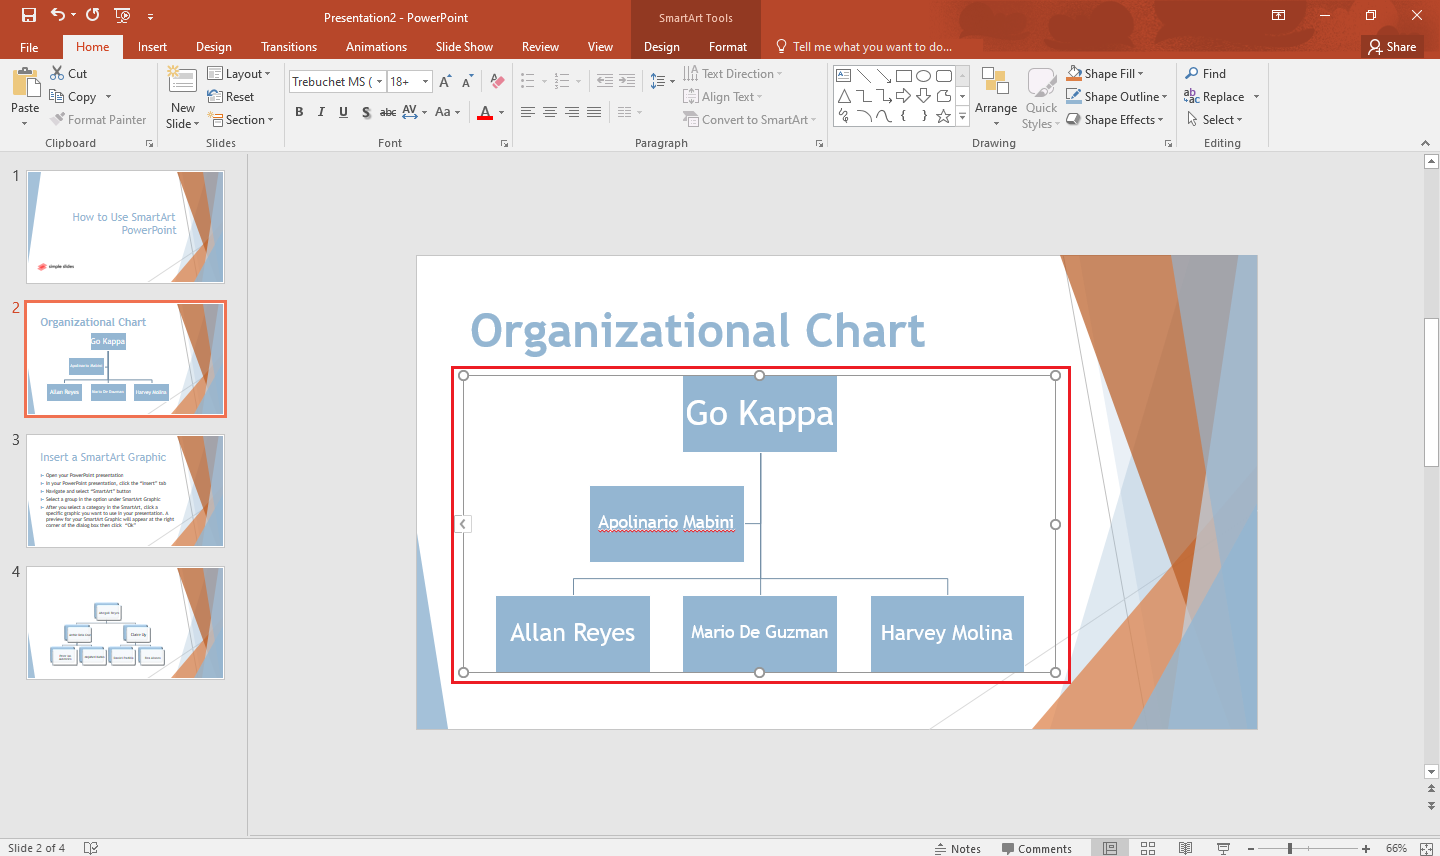
You have now input a text into your SmartArt graphic.
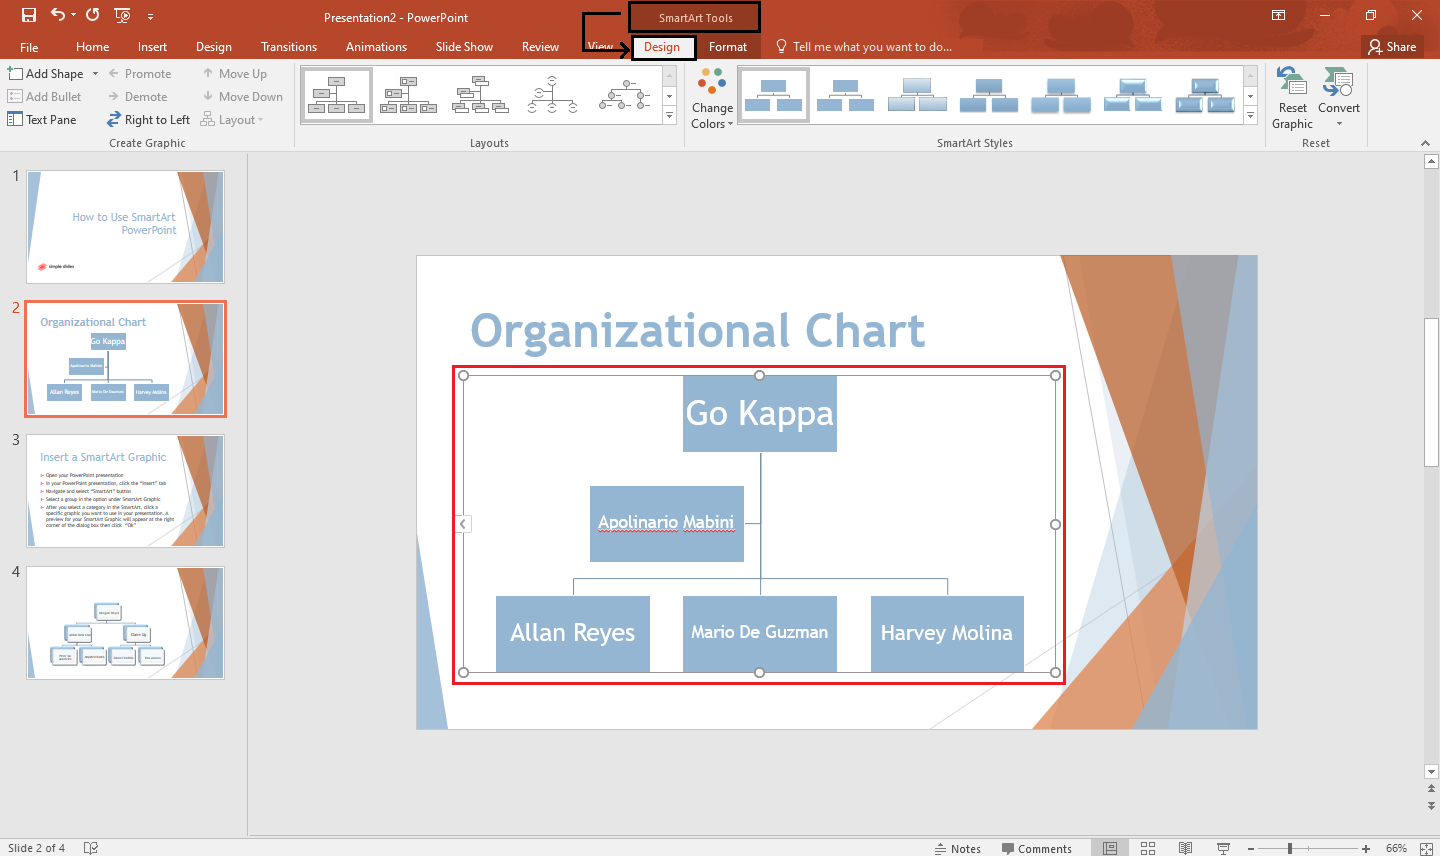
Customize Your SmartArt Graphics.
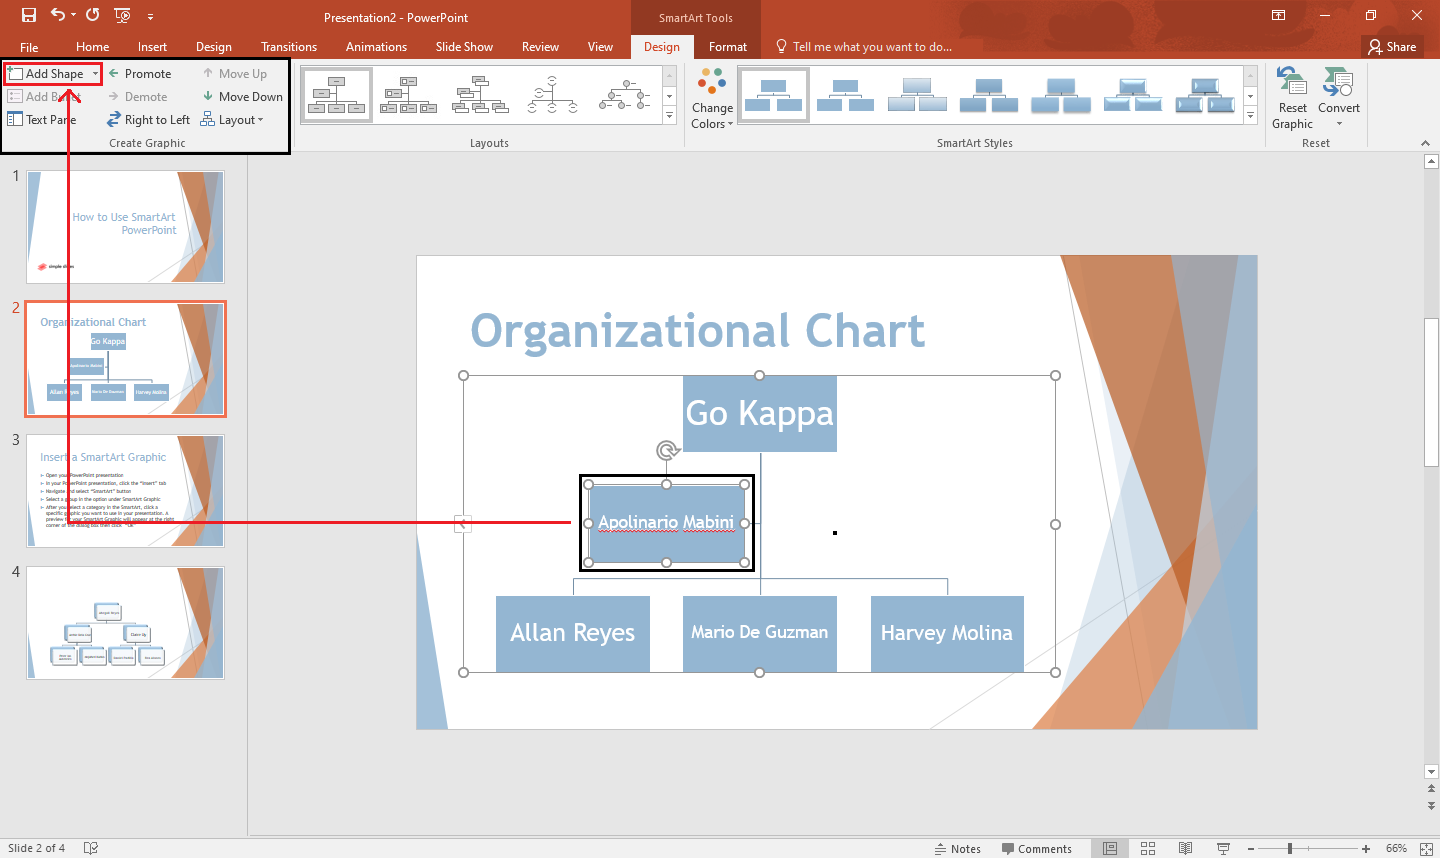
Add shape to your SmartArt PowerPoint.
If you want to add another shape to your SmartArt graphic, you need to;
-
In your existing PowerPoint presentation, select the entire SmartArt graphic.
-
Look for the "SmartArt tool" pane and select the "Design" tab.
-
Select the shape where you want to insert a new shape in your SmartArt graphic, then navigate to "Create graphic group."
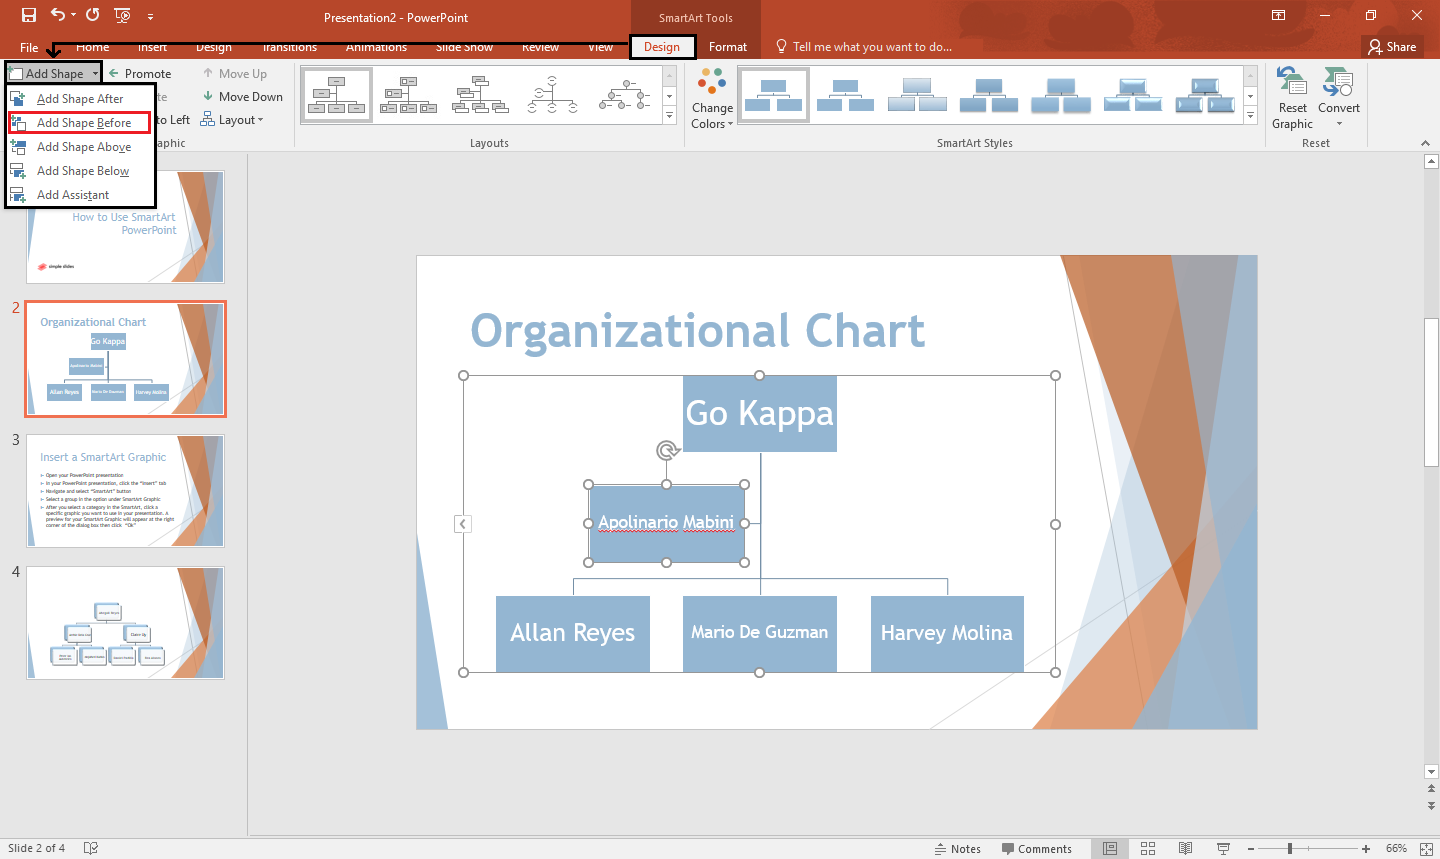
-
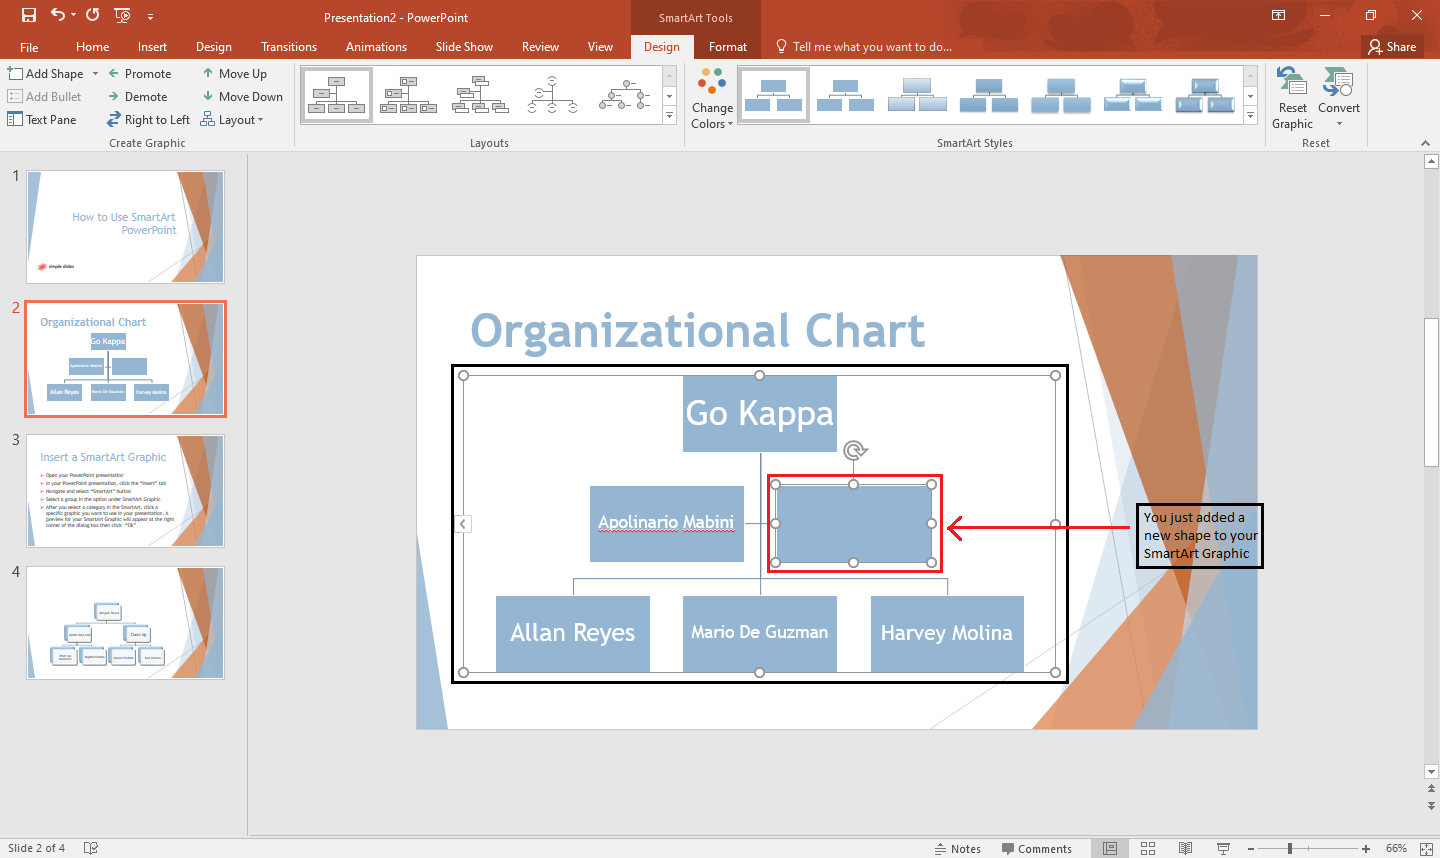
Select "Add Shape," a drop-down arrow will open, and select from the options where you want to insert the new shape in your SmartArt. We chose "Add Shape Before." in our example below.
-
Your new shape will now appear in your PowerPoint presentation.
Delete an unused shape or text pane in your SmartArt.
-
Select the unused SmartArt in the graphic.
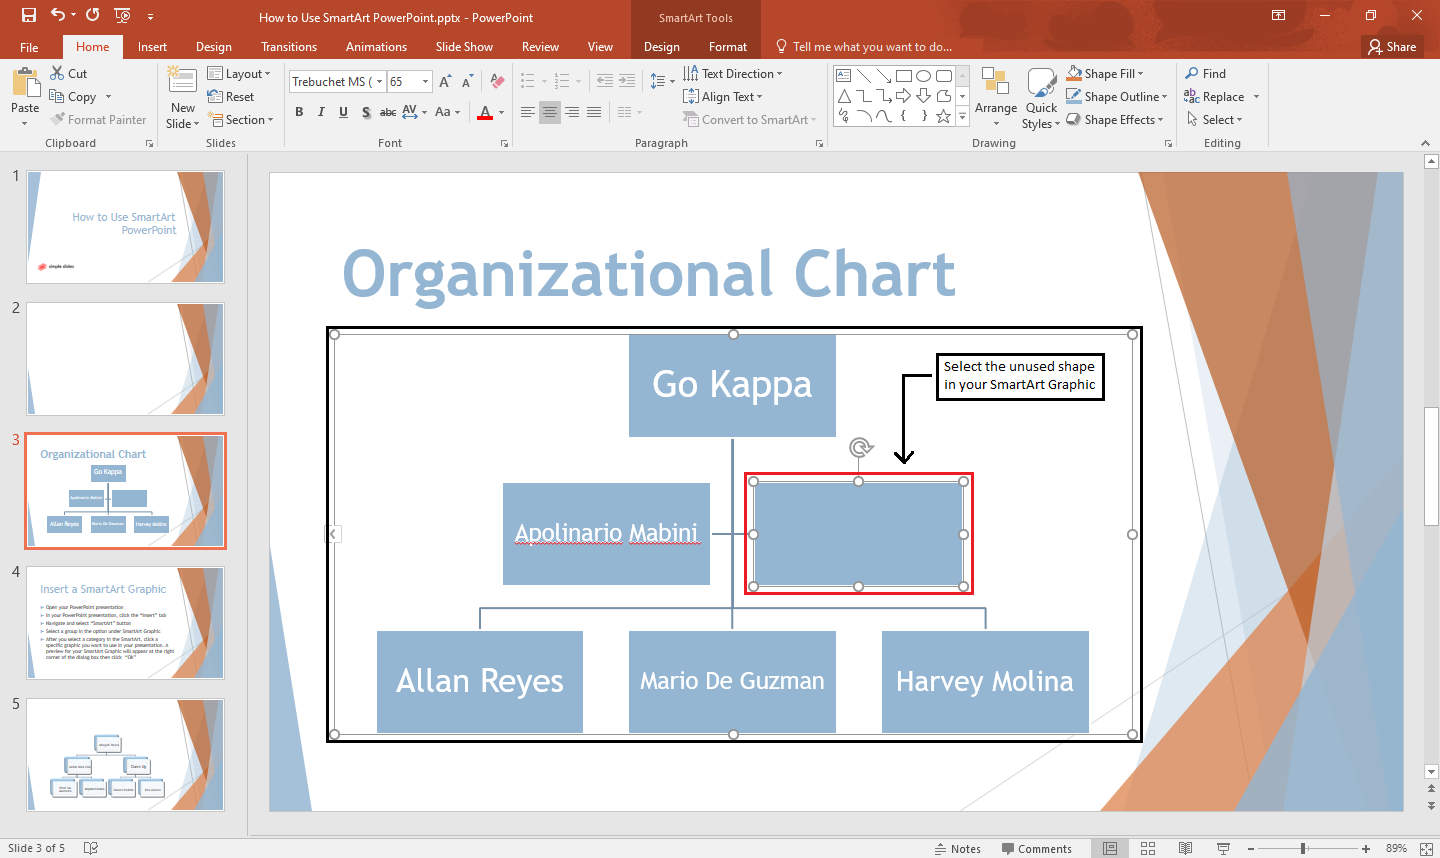
-
Press "delete" or "backspace" on your keyboard to delete the unused text box and graphics.

Change the Colors of Your PowerPoint SmartArt.
-
Select the same SmartArt graphic you want to change colors.

-
Navigate for "SmartArt Tools" and select the SmartArt "Design" tab.

-
In the "SmartArt Styles" group, click "Change colors" and select a specific color for your SmartArt in the drop-down arrow pane.
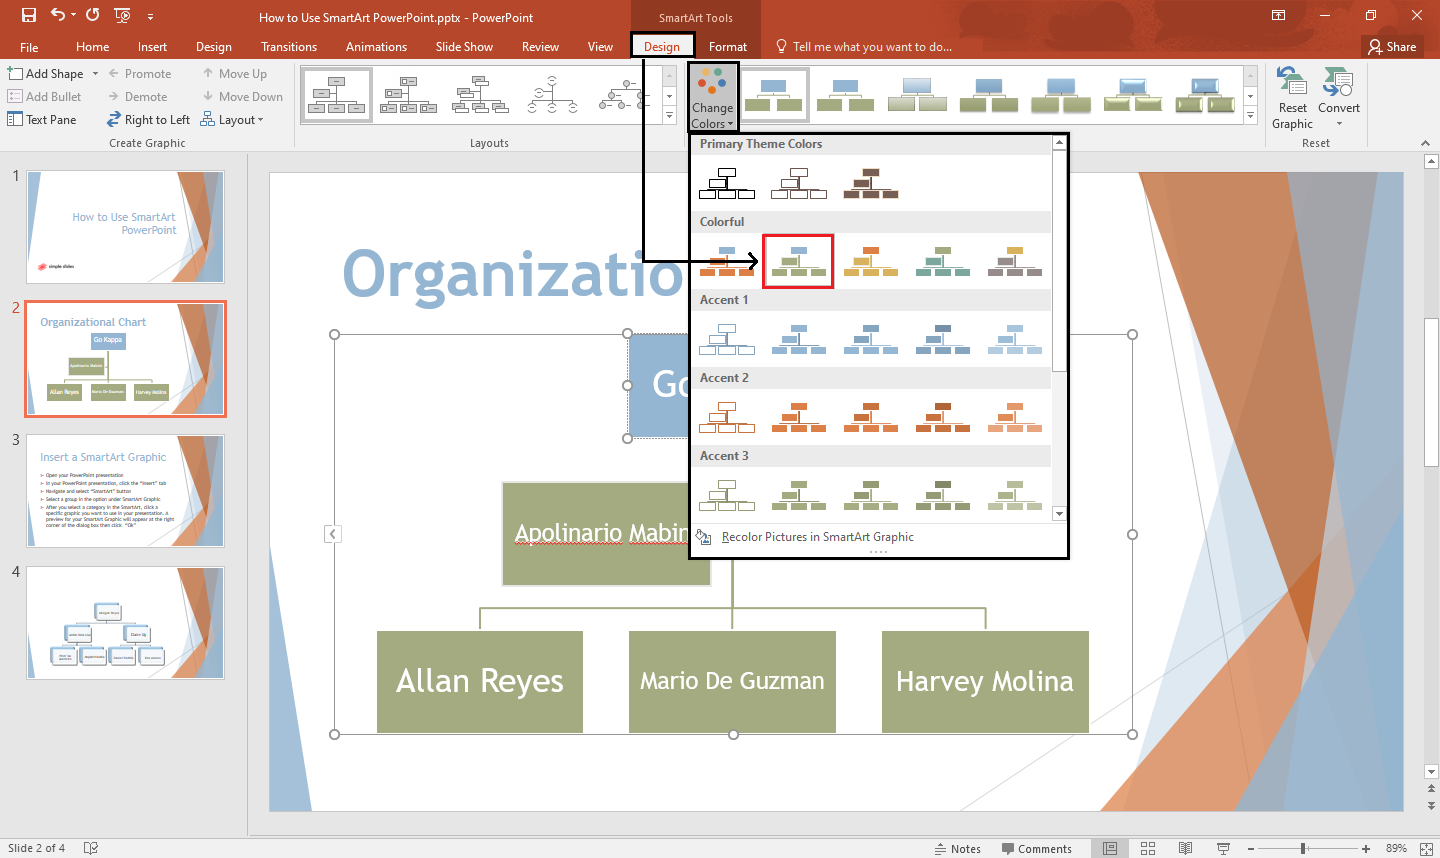
Note: PowerPoint will directly set the theme colors for your SmartArt graphic once you insert a SmartArt.
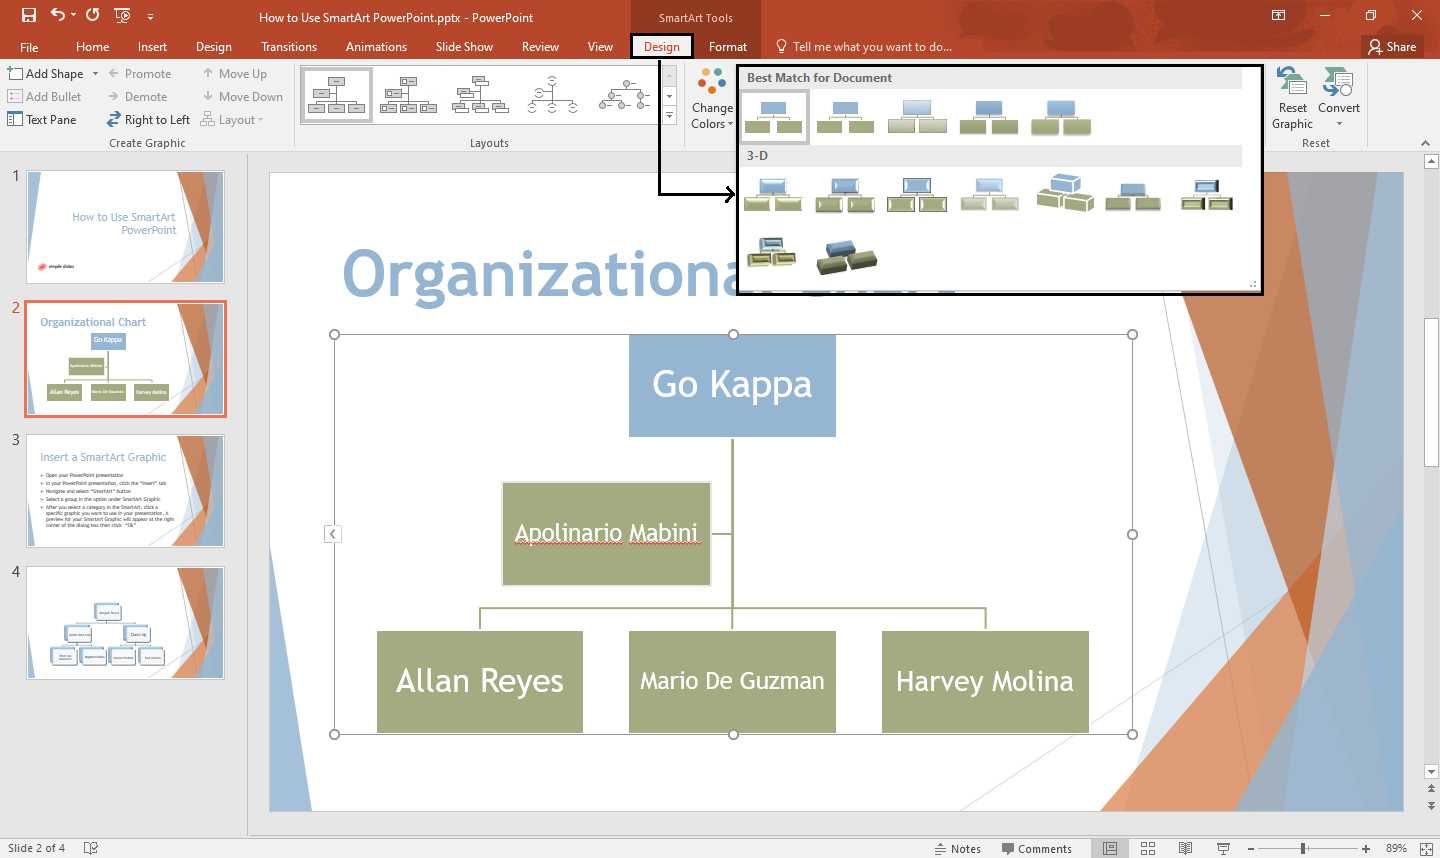
Change the SmartArt Style in Your PowerPoint.
-
Go to the "Design" tab on your PowerPoint SmartArt and look for the "SmartArt Styles" group.
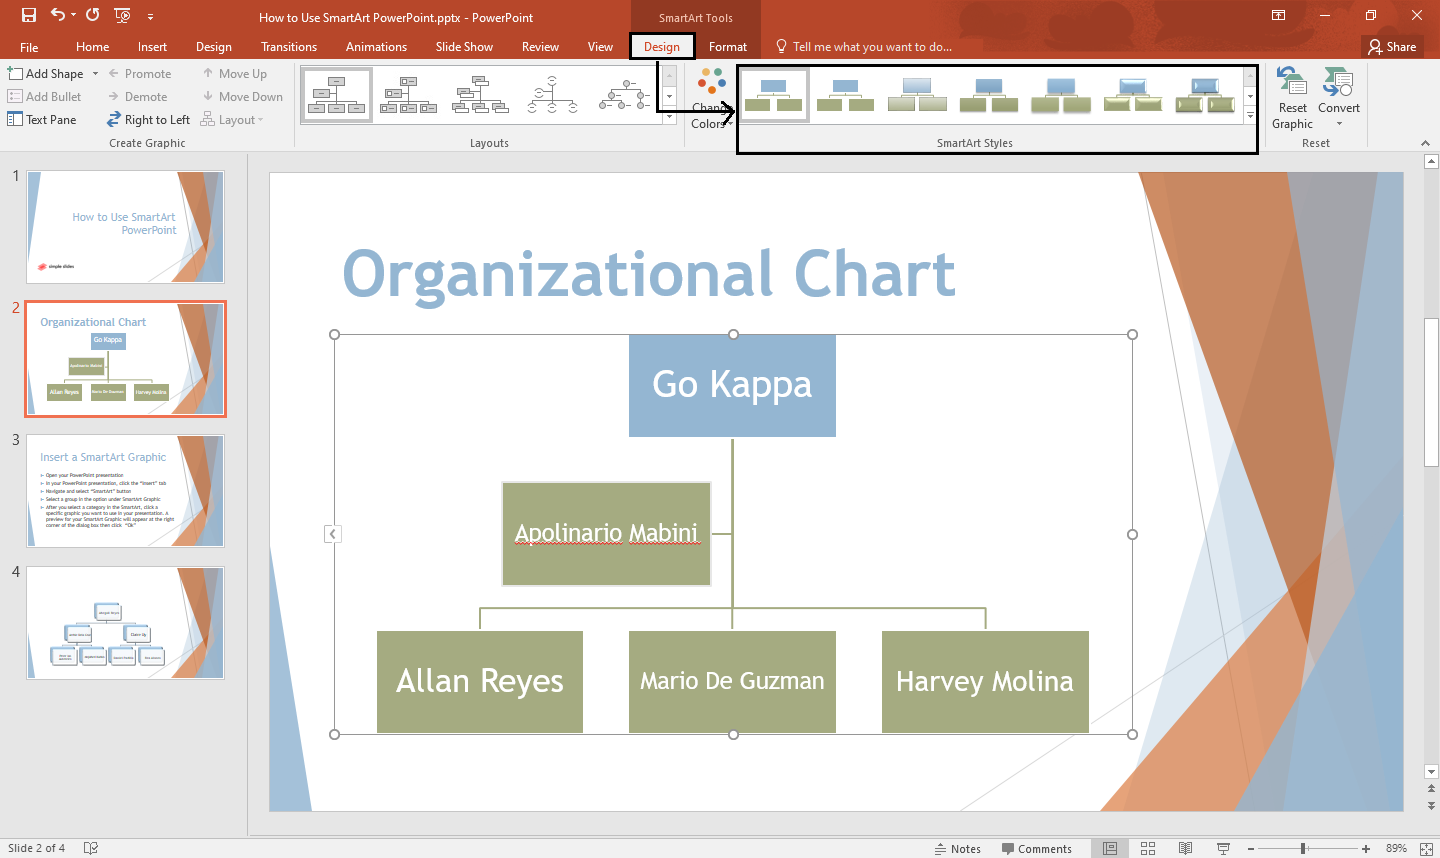
-
Select the particular "SmartArt style" you want for your diagram.
Change the Shape Effects of Your SmartArt Diagram.
-
Select the entire SmartArt graphic in your PowerPoint presentation.
-
In the "SmartArt Tool" tab, select the "Format" tab,
-
Navigate and click "Shape Effects," a drop-down arrow will open, then choose the "Bevel" option.
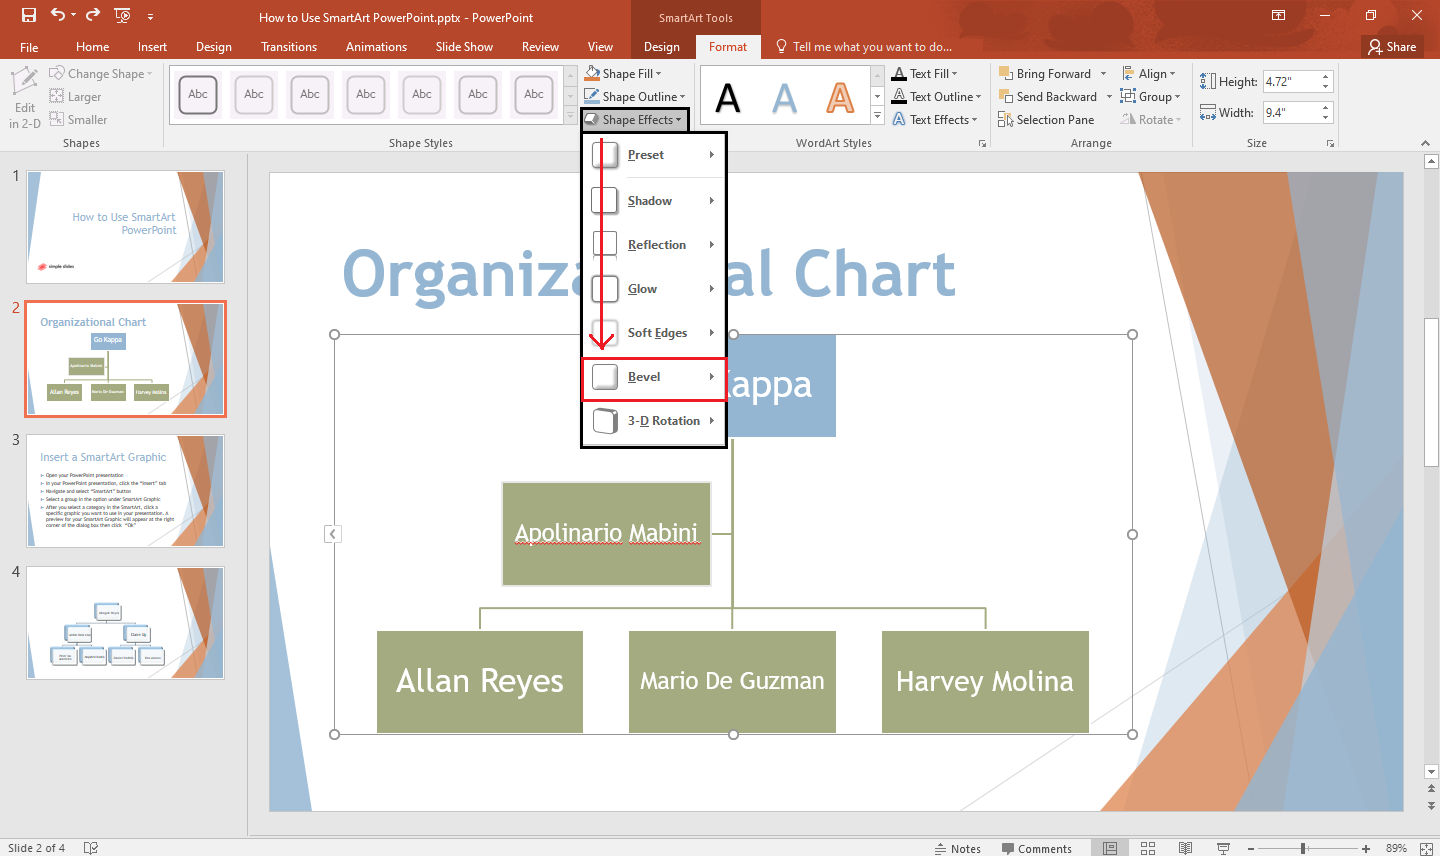
-
A drop-down arrow will open, and select an effect you want to effect in your shape.
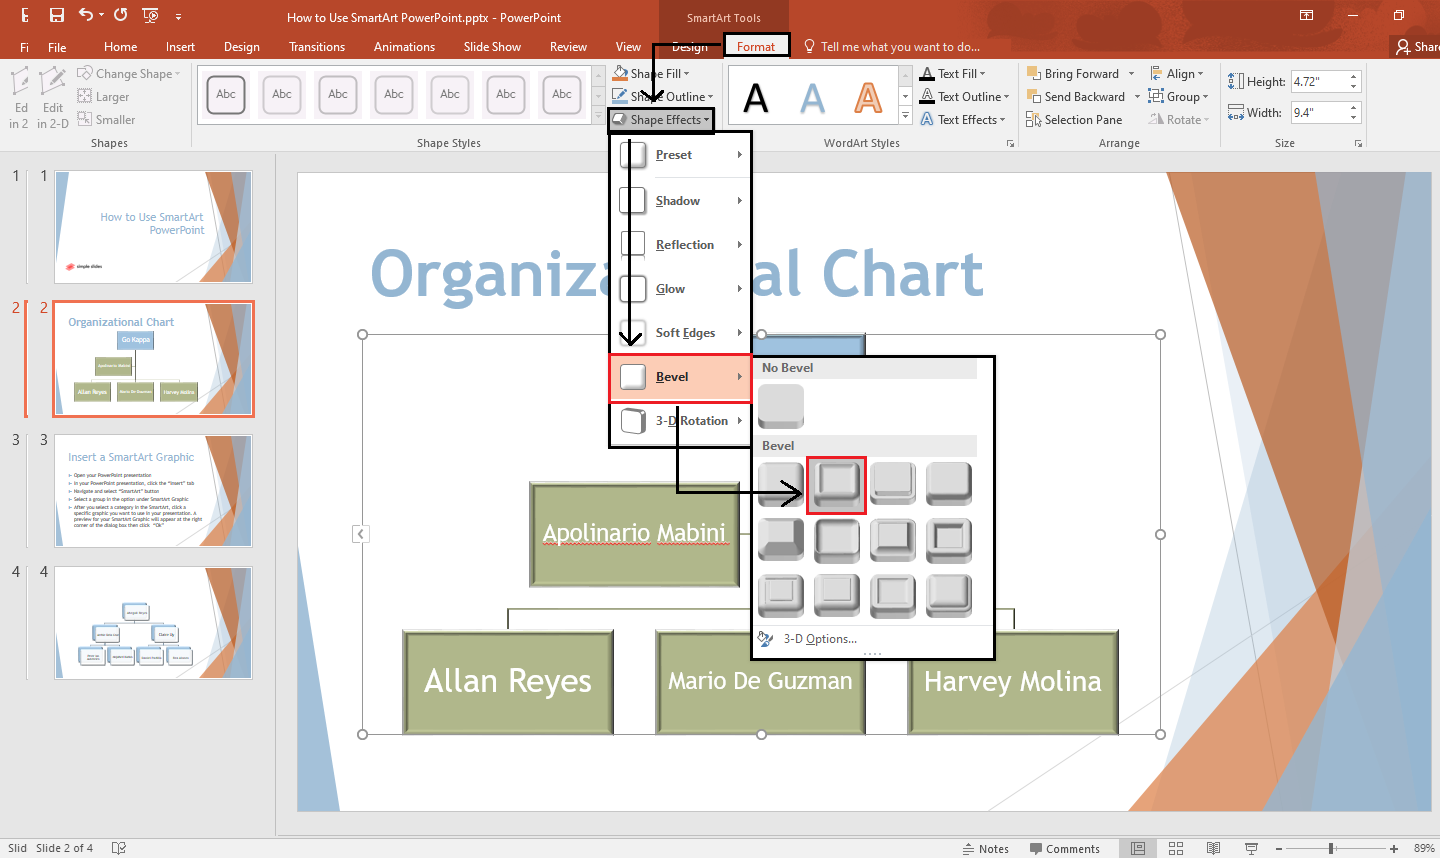
-
The specific effects will directly show after you click it.

Note: You can also choose an individual shape to customize them separately.
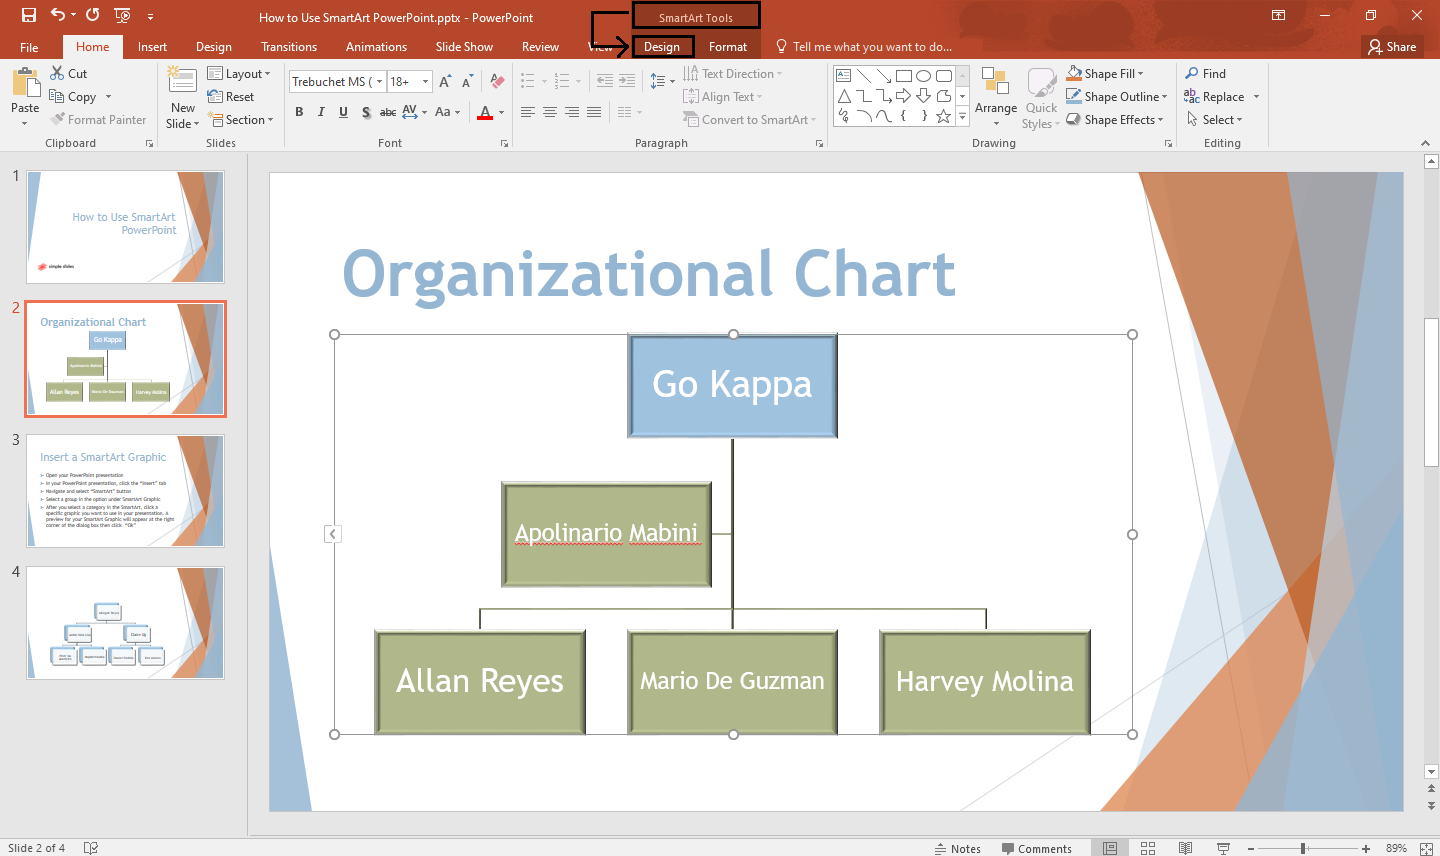
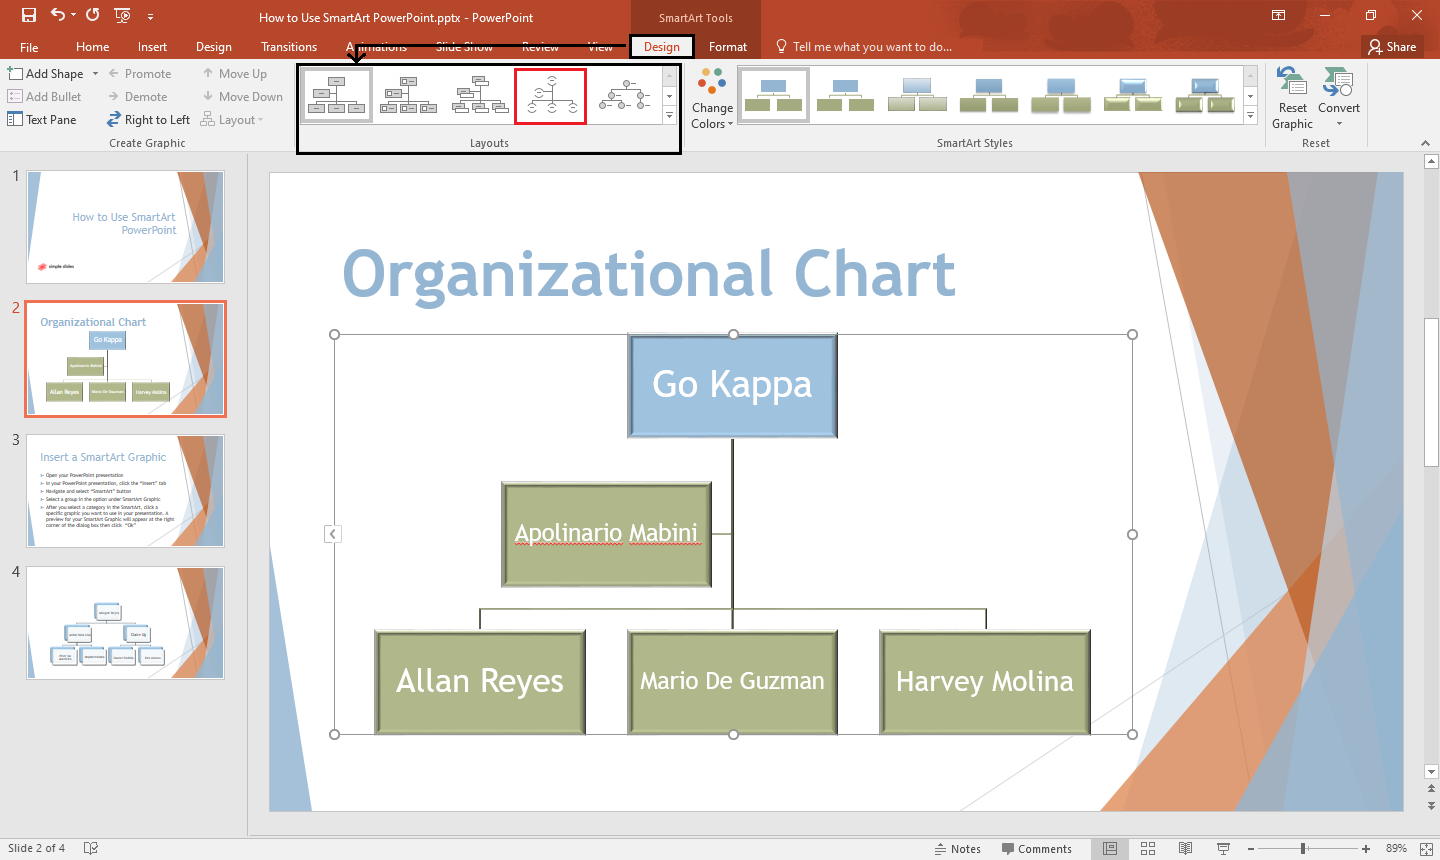
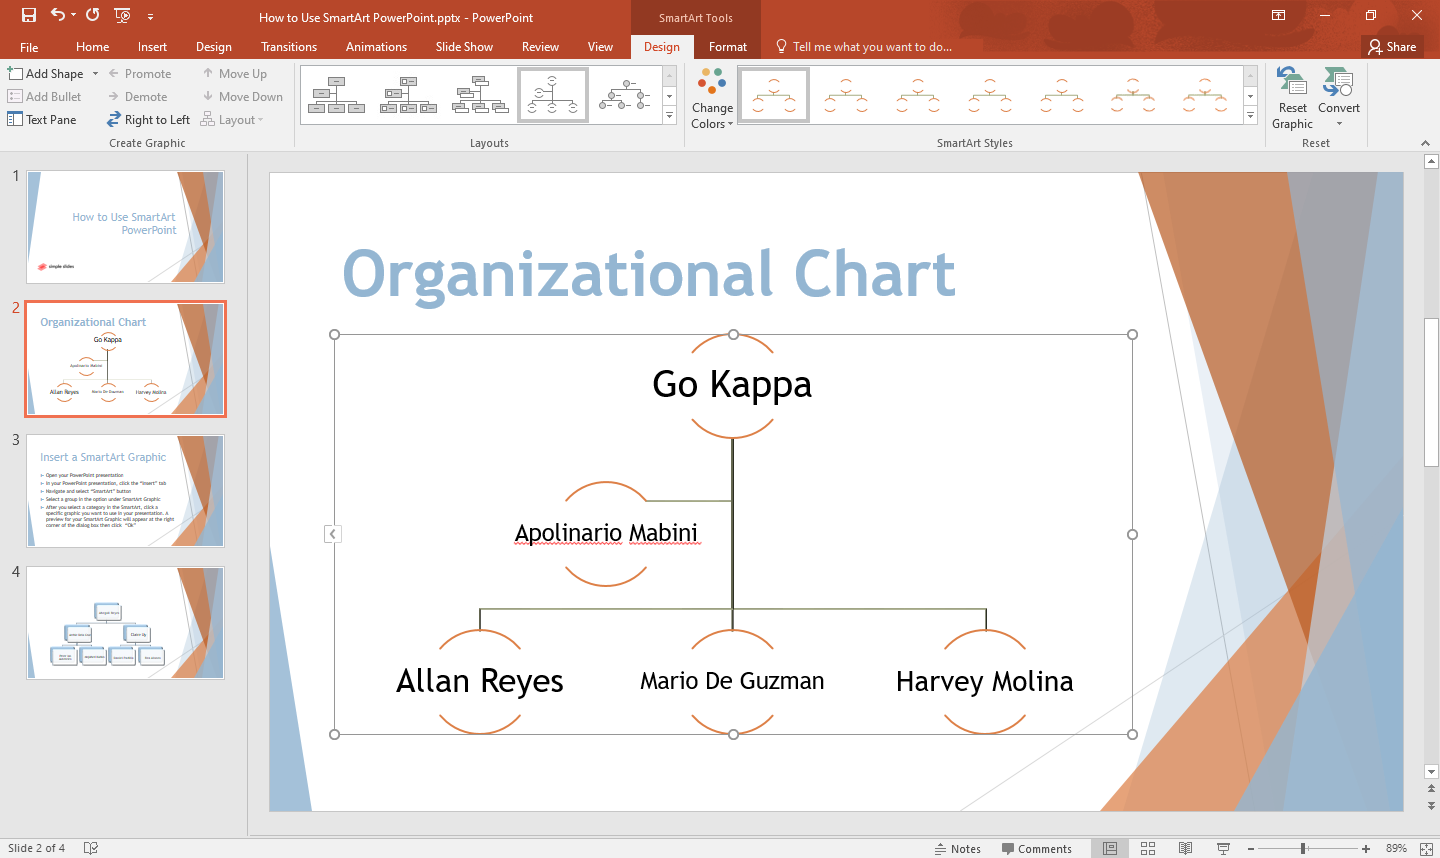
Change SmartArt Layouts.
To customize your SmartArt layout in your PowerPoint, you should;
-
Select the SmartArt graphic in your presentation,

-
Click the "Design" tab under the "SmartArt Tools."
-
Look for the "Layouts" section and choose a particular layout.
-
Your new layout will appear once you click it.

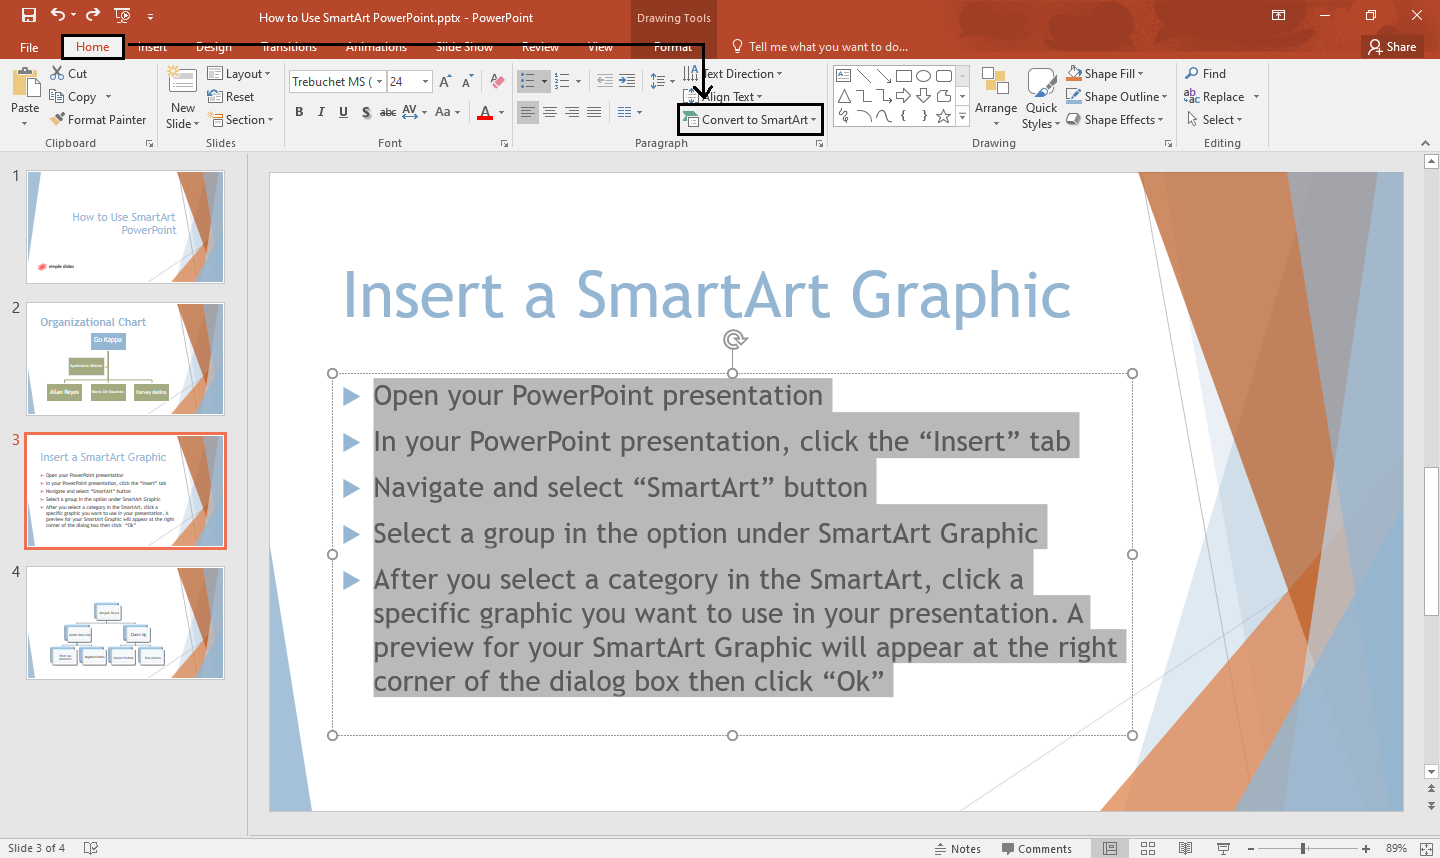
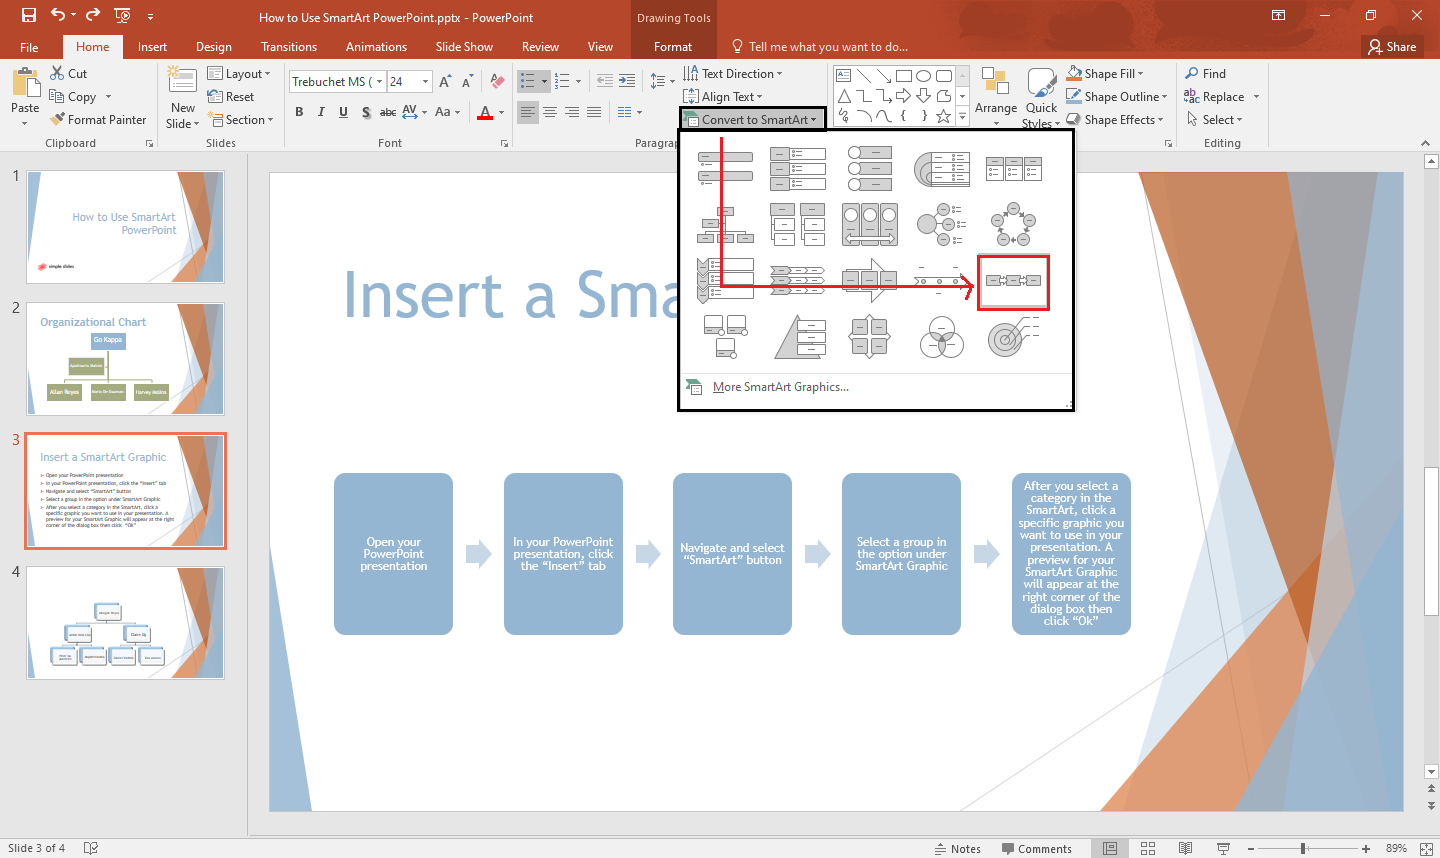
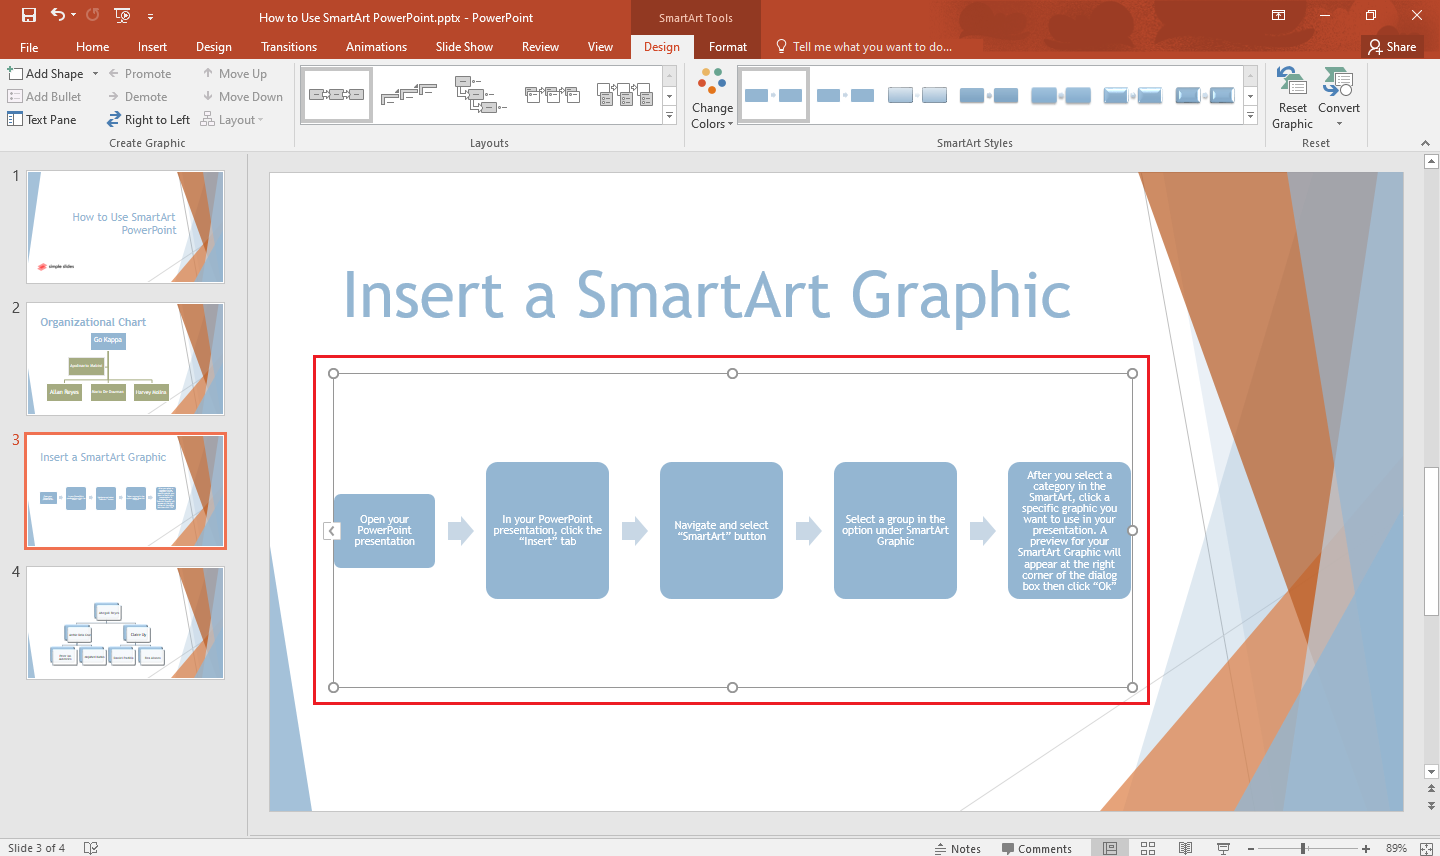
Convert Existing Bullet Points to a SmartArt Graphic.
Suppose you want to turn a bulleted list into a SmartArt diagram. All you need to do is:
-
Highlight or select the bullet lists you wish to convert to SmartArt graphic
-
In the "Home" tab, navigate and click the "Convert to SmartArt" button
-
Choose a SmartArt style for your bullet list.
-
Once your SmartArt diagram appears on your slide, you can drag and resize it.
Final Thoughts about How to Insert SmartArt PowerPoint Graphics.
Now you are an expert on how to insert SmartArt PowerPoint graphics!
If you need a SmartArt graphics diagram for your business reports or any visual representation in your PowerPoint to convey your ideas and information, follow the five quick steps above.
If you want more pre-design graphics and infographics for your PowerPoint presentation, visit Simple Slides, and follow us on Facebook.
Frequently Asked Questions on How to Insert SmartArt PowerPoint Graphics:
How can I rearrange my SmartArt organization chart?
-
Select the individual SmartArt graphic in your PowerPoint.
-
Click your presentation's "Design" tab and look for the "Create Graphic" group.
-
To move the individual shape into a higher position, click the "Promote" section.
-
Your shape will now move to a higher position in your organization chart.

Related Articles:
Marketing Infographics: Everything You Need to Know
Microsoft PowerPoint Tutorial for Beginners
Ideas for a PowerPoint Presentation: 14 Ways You Can Improve Your Presentation
Get A Free Sample of Our Award-Winning PowerPoint Templates + University
Get A Free Sample of Our Award-Winning PowerPoint Templates + University
Join our mailing list to receive the latest news and updates from our team.
Don't worry, your information will not be shared.
We hate SPAM. We will never sell your information, for any reason.